Welcome to my comprehensive guide on migrating your applications from on-premises infrastructure to the cloud using two of the leading cloud service providers: Amazon Web Services (AWS) and Google Cloud Platform (GCP). As businesses increasingly embrace the scalability, flexibility, and cost-efficiency offered by cloud computing, the need to seamlessly transition existing applications to the cloud has become more pressing than ever. In this blog, we’ll walk you through the step-by-step process of migrating your applications from traditional on-premises environments to the cloud, leveraging the robust capabilities and services provided by AWS and GCP. Whether you’re new to the cloud or looking to optimize your existing migration strategies, this guide will equip you with the knowledge and insights needed to navigate the migration journey successfully. So, let’s dive in!
I have divided this Lab into 3 parts:
Part 1: Create your AWS and Google Accounts and add the user to authenticate with Terraform.
Part 2: Running Terraform to provision MultiCloud infrastructure in AWS and Google Cloud.
Part 3: Connect to the Google Kubernetes Engine cluster via the Console to deploy the application.
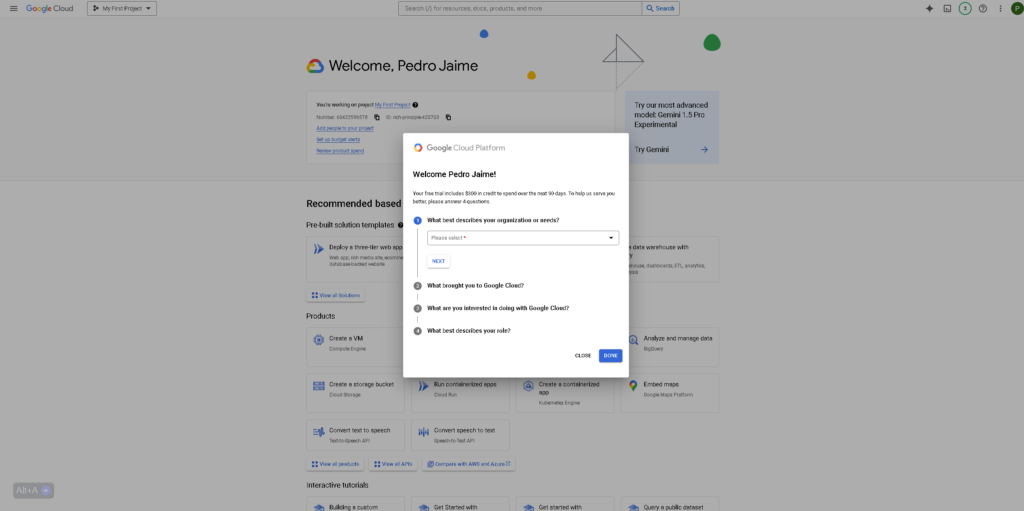
Create Your GCP Free Account
Go to this website
https://console.cloud.google.com/freetrial
Advice: I strongly recommend creating a new Gmail account, instead of using your personal!
Now go back to the AWS Console and setup Terraform
We are going to use Terraform to provision our infrastructure in a multi-cloud environment and we are going to do that on AWS and GCP
First, We need to create a user on AWS that is going to be used by Terraform to authenticate Terraform with AWS so that the resources can be created.
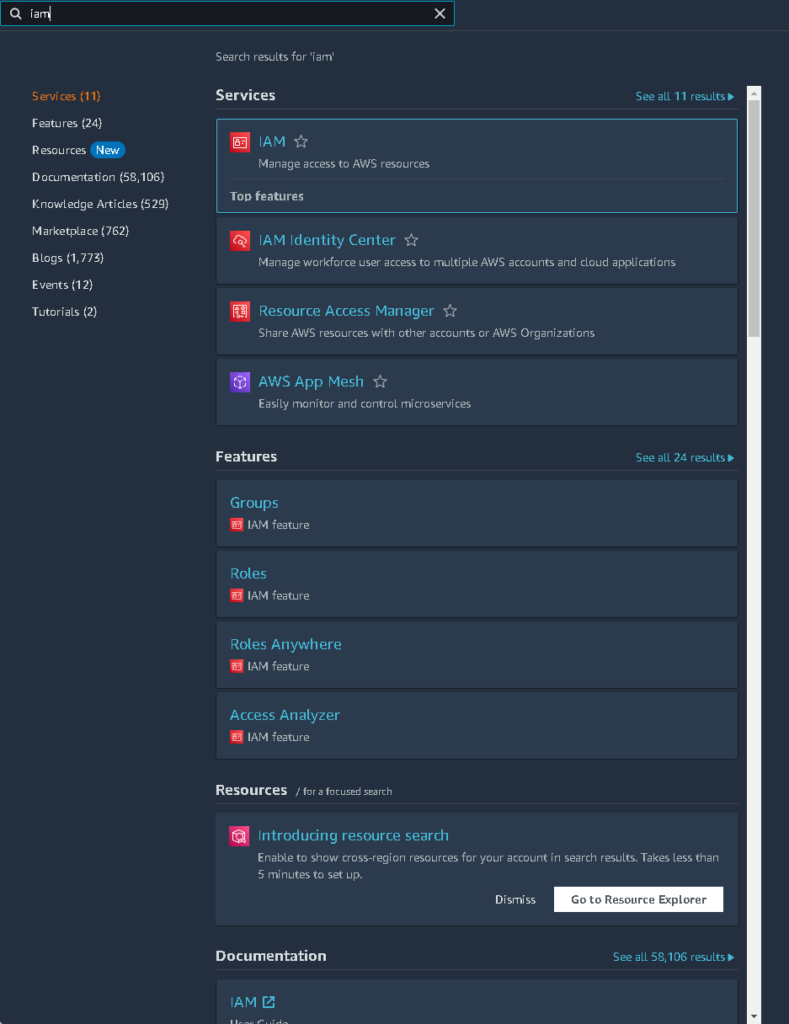
In the search bar type in IAM.
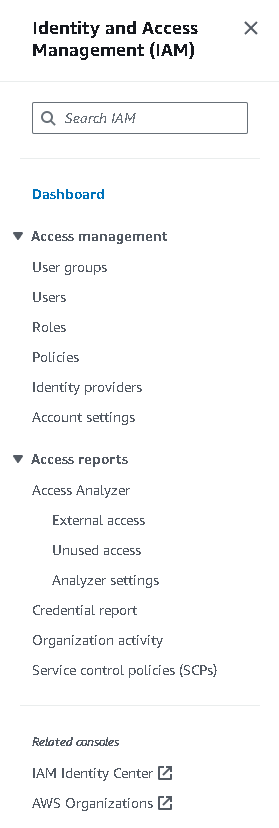
We are going to create a user called terraform-en-1 using the IAM service. On the left-hand side of the IAM Dashboard, click on “Users“
From there, click “Create User”

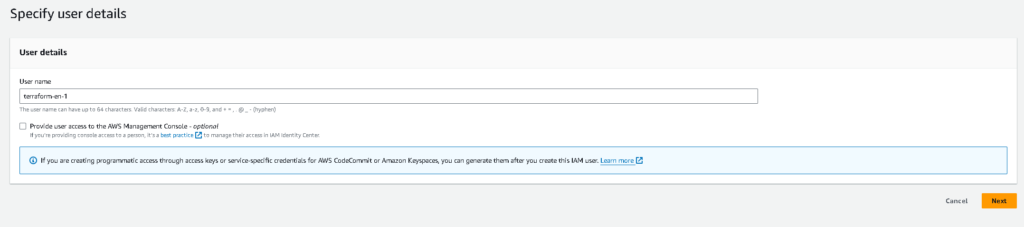
Then you are going to call this user “terraform-en-1”, and then click “Next”
In Set Permissions, click on the Attach existing policies. and search for “AmazonS3FullAccess”. We want Terraform to have privileges to create the S3 bucket.
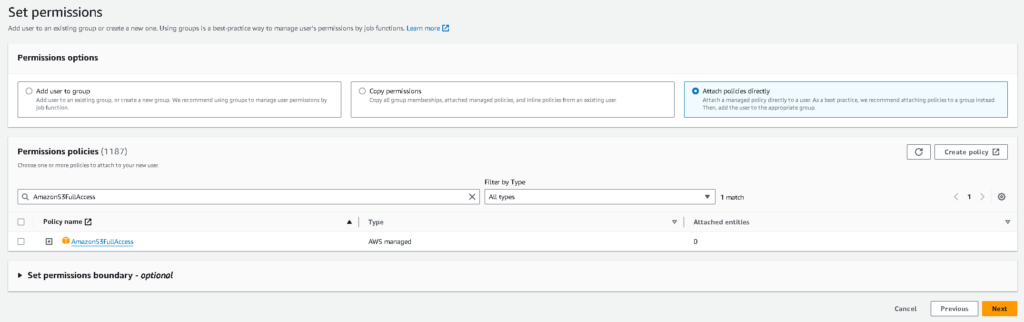
After that just click on “Next” and “Create User”
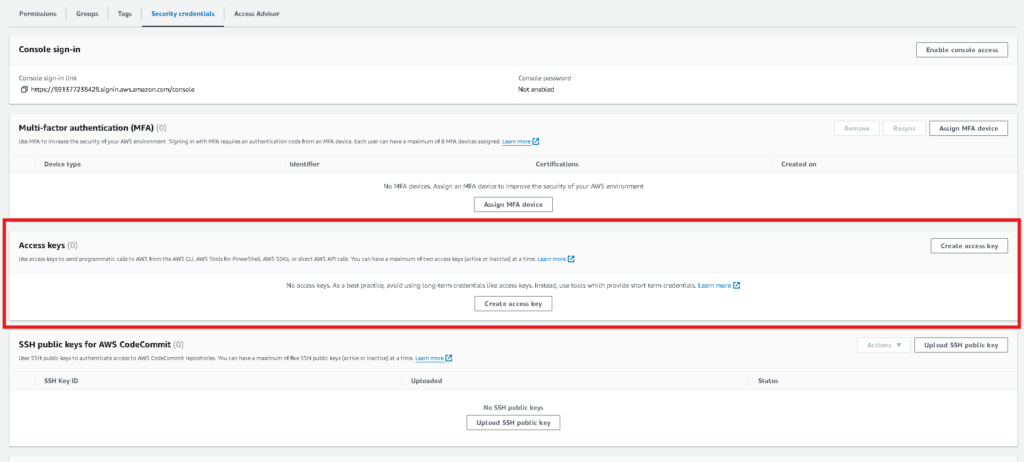
Creating the Access Key for the terraform-en-1 user using the IAM service to authenticate with AWS
Click on the user name.

Then click on “Security Credentials”

- Navigate down to the Access Keys section
- Click on Create access key
Select Command Line Interface (CLI) and I understand the above recommendation and want to proceed to create an access key. Then click Next.
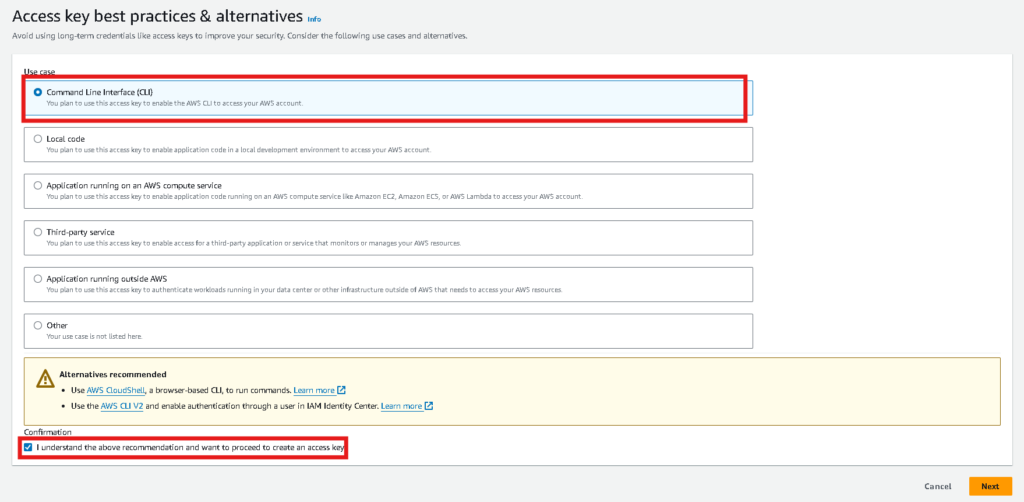
Then click Create Access Key

Very Important! Do NOT click Done. Click on Download .cvs file.

- After the download, save it to a folder on your desktop and click Done.
- Once the download is complete, rename the .csv file to key.csv
Steps in Google Cloud Platform (GCP)
Preparing the environment to run Terraform
We going to now shift over to GCP and use Cloud Shell as a virtual terminal to run commands run Terraform and provision the Multi-cloud environment (AWS, GCD).
- Access the Google Cloud Console (console.cloud.google.com) and log in with your newly created account.
- Open the Cloud Shell


Download the mission1.zip file in the Google Cloud shell by copying and pasting using the wget command below:
wget https://tcb-public-events.s3.amazonaws.com/icp/mission1.zip
It contains all the files we need to provision the infrastructure using Terraform

Now we upload the key.csv file that we saved earlier to the Cloud Shell using the browser.

Choose the file then upload it.

Verify if the mission1.zip and key.csv files are in the folder in the Cloud Shell using the command “ls” to show files and directories

As you can see, we have downloaded key.csv and mission1.zip.
Let’s start unzipping the zip file and start by using these commands to organize them
unzip mission1.zip
(unzip the file)
mv key.csv mission1/en
(move file to mission1 folder then into the en subfolder.)
cd mission1/en
(go inside that directory)
chmod +x *.sh
(Change permission of the files)
Next, step is to prepare the cloud shell and the files for terraform to authenticate with AWS and GCP
We are going to run some command to configure the folders and the files like the key files which terraform is going to look and see the access key information for the authentication.
mkdir -p ~/.aws/
( create a new folder to store the AWS credentials )
touch ~/.aws/credentials_multiclouddeploy
(Create file to store the credentials)
./aws_set_credentials.sh key.csv
Copy the contents of the key.csv file to the credential file for terraform to look at and authenticate.)
GOOGLE_CLOUD_PROJECT_ID=$(gcloud config get-value project)
(set the project ID. Its basically the folder where you organize your resources on Google Cloud.)
gcloud config set project $GOOGLE_CLOUD_PROJECT_ID
(set the project to the one we just defined to create resources inside of this project.)
After entering all the commands this will pop up and just click “Authorize”

Next, we are going to run a shell script to set Project ID inside the Terraform file so Terraform can know where to create the resources on Google Cloud.
The script is :
./gcp_set_project.sh
Now we are going to execute the commands to enable the Kubernetes, Container Registry, and Cloud SQL APIs. Enabling the API so Terraform can use the APIs to create resources on Google Cloud. We are making API calls to Google Cloud to ask Google Cloud to make resources for us. Resources like the Kubernetes Clusters, VPC, Cloud SQl, etc.
gcloud services enable containerregistry.googleapis.com
gcloud services enable container.googleapis.com
gcloud services enable sqladmin.googleapis.com
gcloud services enable cloudresourcemanager.googleapis.com
gcloud services enable serviceusage.googleapis.com
gcloud services enable compute.googleapis.com
gcloud services enable servicenetworking.googleapis.com --project=$GOOGLE_CLOUD_PROJECT_ID
After running the commands it should say that you have finished successfully after everyone.
Running Terraform to provision MultiCloud infrastructure in AWS and Google Cloud
- Execute the following commands to provision infrastructure resource.
cd ~/mission1/en/terraform/
(Go inside terraform folder)
terraform init
(download terrafrom plugins to run terraform code and communicate with the cloud provider)
terraform plan
(visualize what terraform is going to do on our cloud infrastructure before it actually does it.)
terraform apply
ask to provision the resoruces. In the terminal you will say "Yes" and it will start to deploy the resources.
It will look something like this.
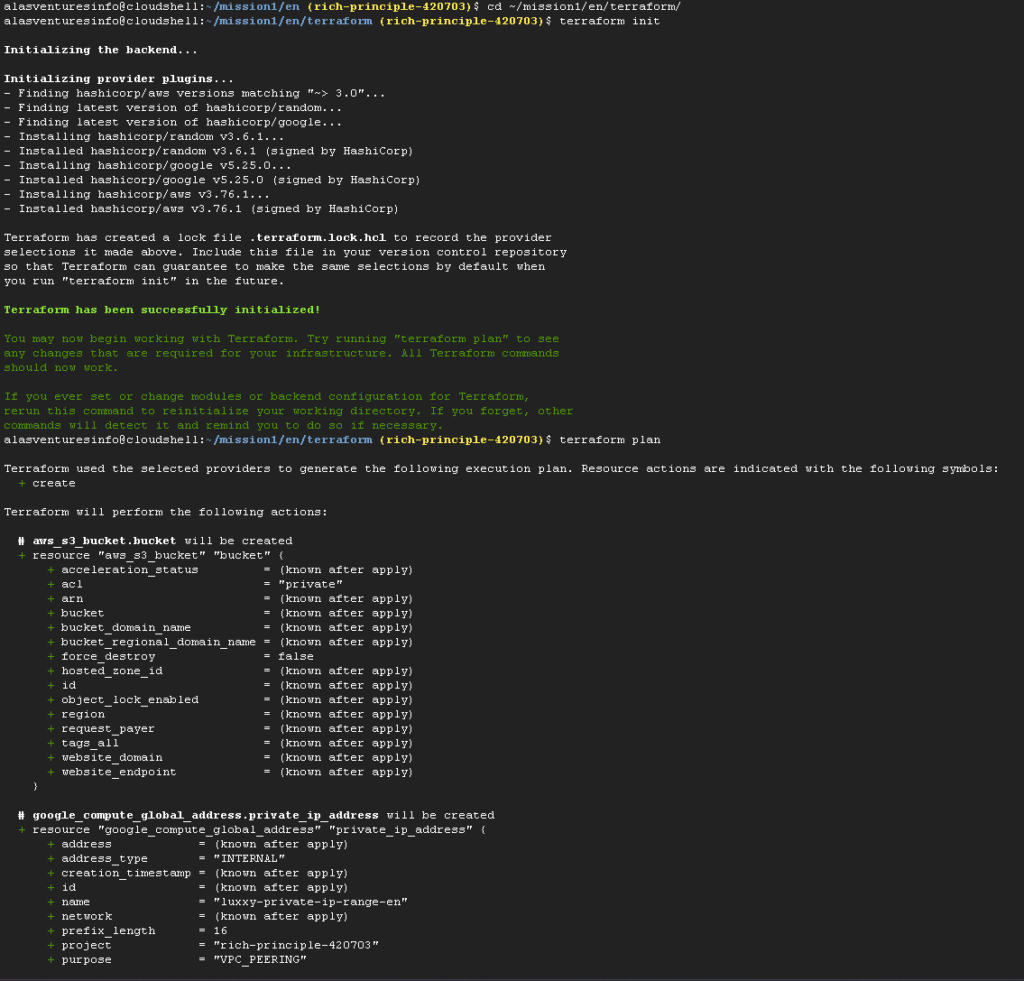
It will look like this but with more printed out after the terraform plan command
Once you run the terraform apply command it will eventually ask you to type yes to deploy the resources:
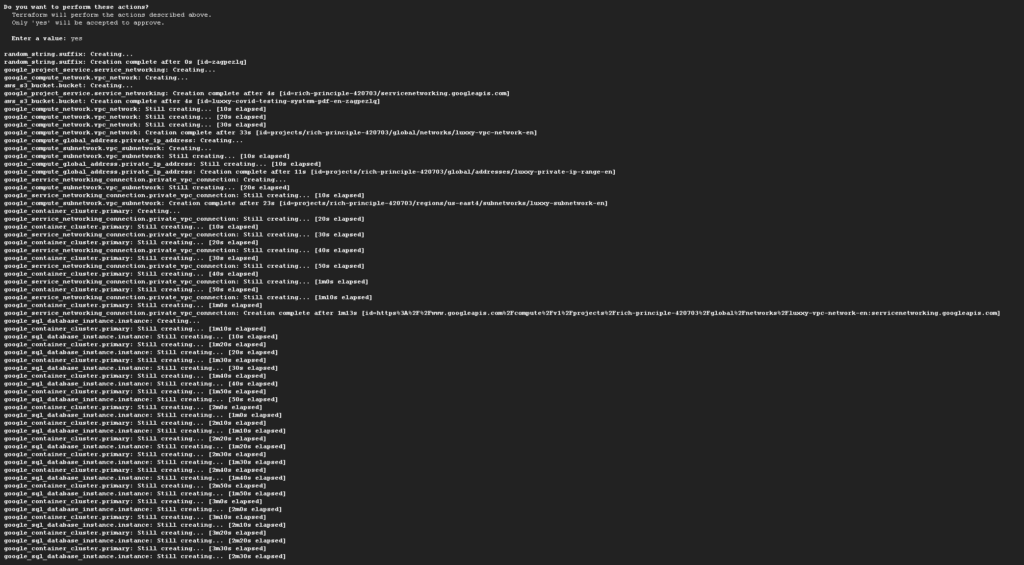
Note: The provisioning process can take between 15 to 25 minutes to finish. Keep the CloudShell open during the process. If disconnected, click on Reconnect when the session expires (the session expires after 5 minutes of inactivity by default)
make sure to put the pictures of your stuff being in the data base in AWS and S3
Part 2
Now we are going to containerize the application and then deploy it inside the Kubernetes cluster.
But first, we need to:
- Access the AWS console and go to the IAM service again and do everything that we did in Part 1
- Under Access Management, Click on “Users”, and then “Add users”. Insert the User name luxxy-covid-testing-system-en-app1 and click on Next to create a programmatic user.
This user is going to be used to authenticate our application that is going to be running inside the Kubernetes cluster with AWS S3 service. The S3 storage is going to store the PDF files of the COVID test
In order for the application to authenticate with the S3, to upload files and read the files we need to have an authentication inside their application.

In Set Permissions, click on the Attach existing policies. and search for “AmazonS3FullAccess”. We want Terraform to have privileges to create the S3 bucket.
After that just click on “Next” and “Create User”
Creating the Access Key for the luxxy-covid-testing-system-en-app1 user using the IAM service to authenticate with AWS
Click on the user name luxxy-covid-testing-system-en-app1

Then click on “Security Credentials”
- Navigate down to the Access Keys section
- Click on Create access key
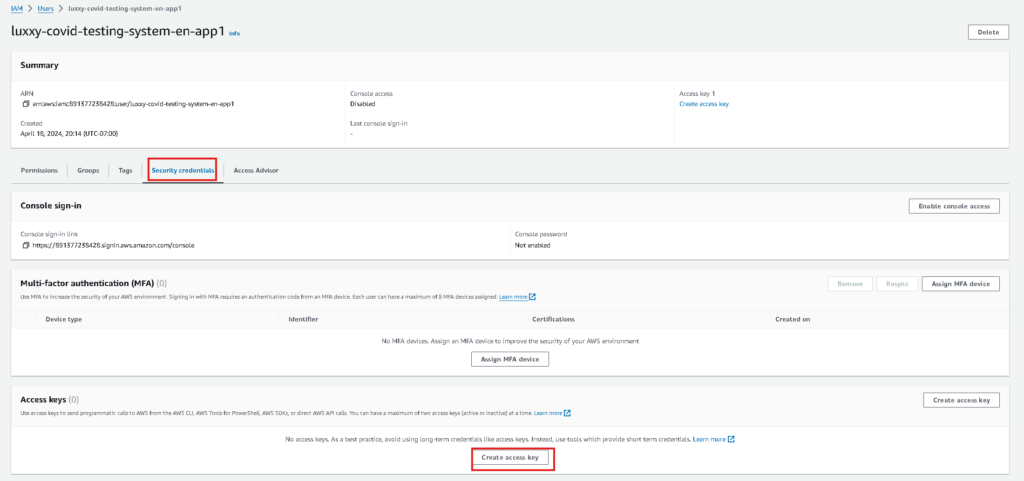
Select Command Line Interface (CLI) and I understand the above recommendation and want to proceed to create an access key. Then click Next.

Then click Create Access Key
Very Important! Do NOT click Done. Click on Download .cvs file.
- After the download, save it to a folder on your desktop and click Done.
- Once the download is complete, rename the .csv file to COVIDkey.csv
Steps in Google Cloud Platform (GCP)
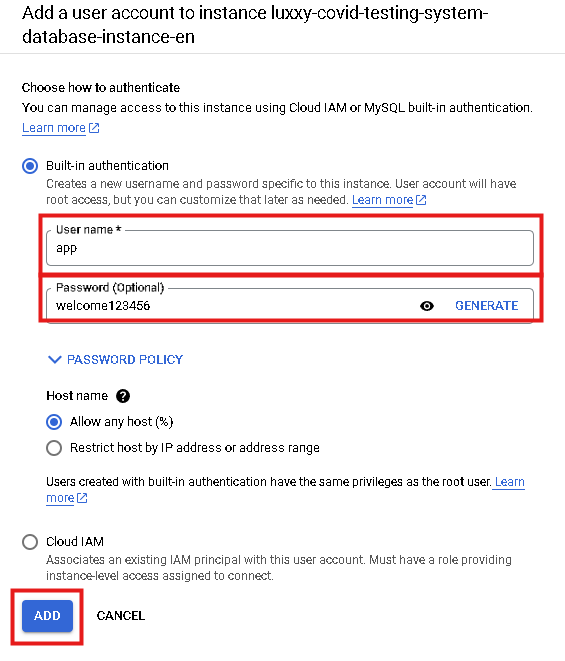
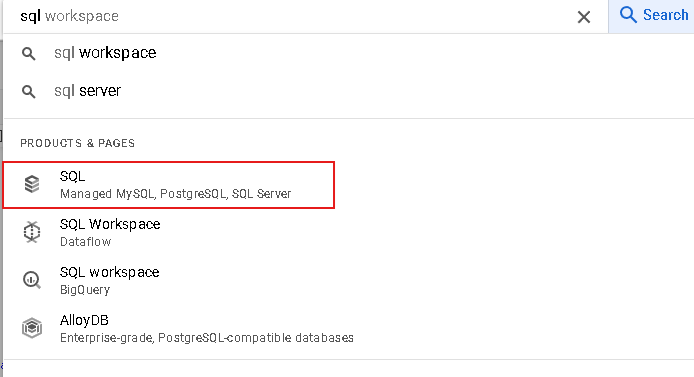
- Navigate to the Cloud SQL instance by typing SQL in the search box and create a new user app with password welcome123456 on the Cloud SQL MySQL database and create the table inside the MySQL database so that the application can authenticate from the database.
- You can the MySQL instance here. Click on it.

Go to users and add a user account.

Type the username app with the password welcome123456. Then click Add.
Now that the user has been created,
Connect to Google Cloud Shell
Download the mission2 files to Google Cloud Shell using the wget command as shown below

Copy
cd ~
(Home directory)
wget https://tcb-public-events.s3.amazonaws.com/icp/mission2.zipunzip mission2.zip
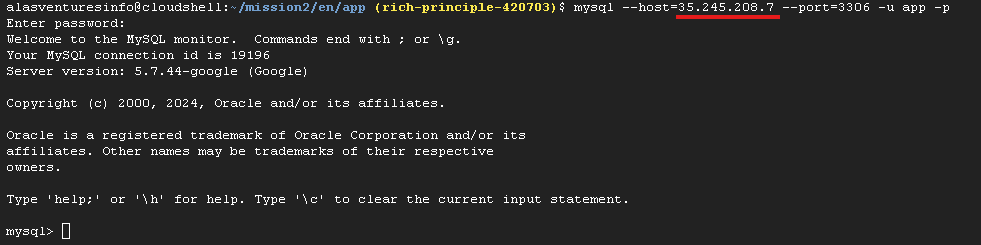
Now we are going to connect to MySQL DB running on Cloud SQL using the user we created earlier. (once it prompts for the password, provide welcome123456). Don’t forget to replace the placeholder with your Cloud SQL Public IP.
First, we need to figure out the Public IP address. On the right side, click on Overview and copy the Publick IP Address.

Then, we are going to use this command to connect to the MySQL database.
mysql --host=<replace_with_public_ip_cloudsql> --port=3306 -u app -pMake sure you replace <replace_with_public_ip_cloudsql> in the command with the Public IP Address that you copied. So for me, I replaced it like this:
mysql --host=35.245.208.7 --port=3306 -u app -p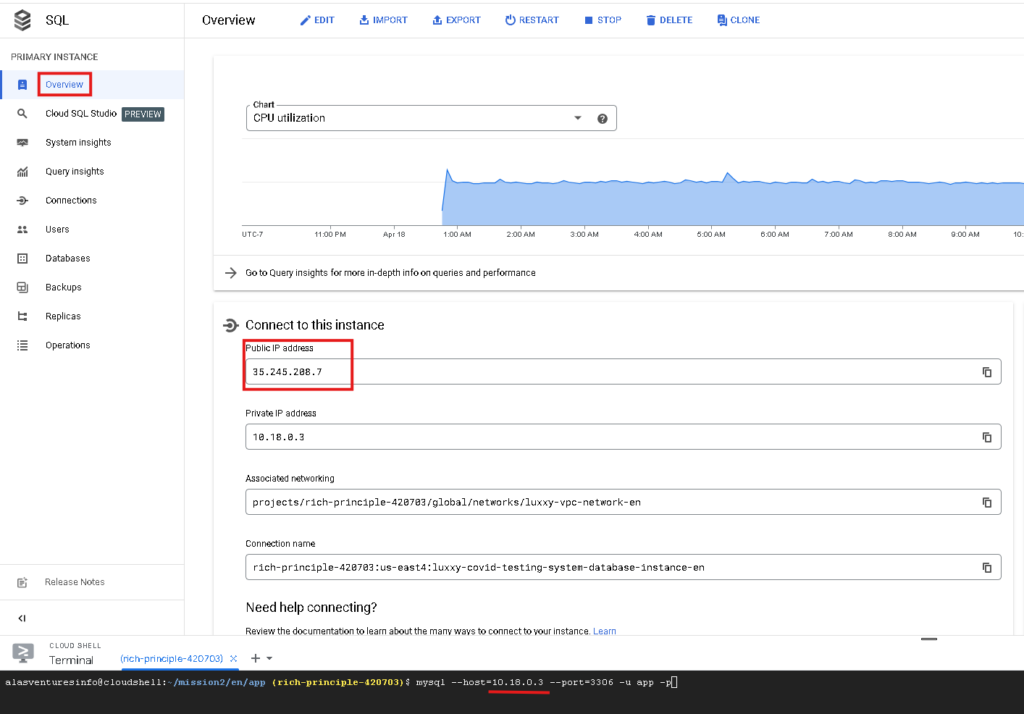
Then type in the password which is welcome123456
Now we are connected to the MYSQL database.
Now we are going to create the products table for COVID testing purposes.
use dbcovidtesting;source ~/mission2/en/db/create_table.sql
(create table)show tables;exit;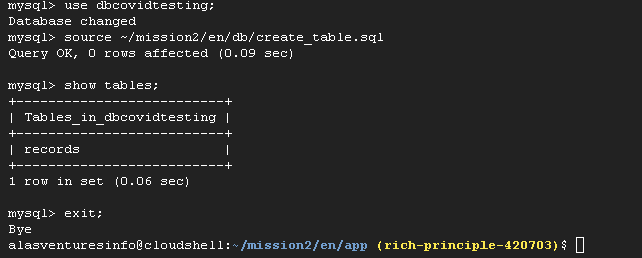
We have one table and this table is going to host the entries of data they is being inserted into the application and it will store it inside this table.
Now we are going to enable Cloud Build API via Cloud Shell. We are going to use Cloud Build to create our Docker Image.
gcloud services enable cloudbuild.googleapis.comYou will get a pop-up message to authorize so just clock on Authorize.
Now that we have prepared the database, we are going to build the Docker image and push it to Google Container Registry.
GOOGLE_CLOUD_PROJECT_ID=$(gcloud config get-value project)
(Get the project ID)
cd ~/mission2/en/app
(go inside directory where )gcloud builds submit --tag gcr.io/$GOOGLE_CLOUD_PROJECT_ID/luxxy-covid-testing-system-app-en
(create a docker image and push to container registry )After running the commands, it should give you this status:

If you want to make sure, type in container registry in the search box.

Then you can see we have a docker image.

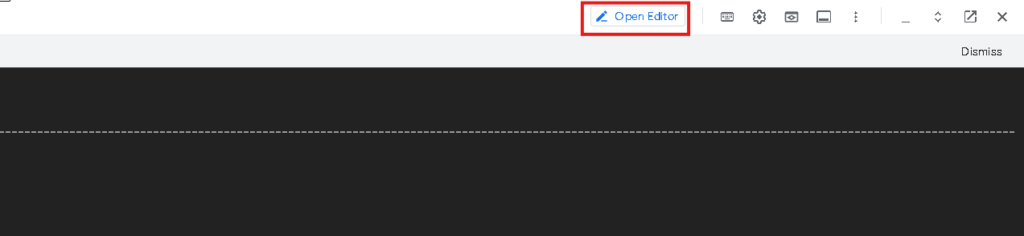
Now let us open the Cloud Editor on the top right of the Cloud Shell and edit the Kubernetes deployment file (luxxy-covid-testing-system.yaml) and update the variables below on line 33 in red with your <PROJECT_ID> on the Google Container Registry path, on line 42 AWS Bucket name, AWS Keys (open file luxxy-covid-testing-system-en-app1.csv and use Access key ID on line 44 and Secret access key on line 46) and Cloud SQL Database Private IP on line 48.
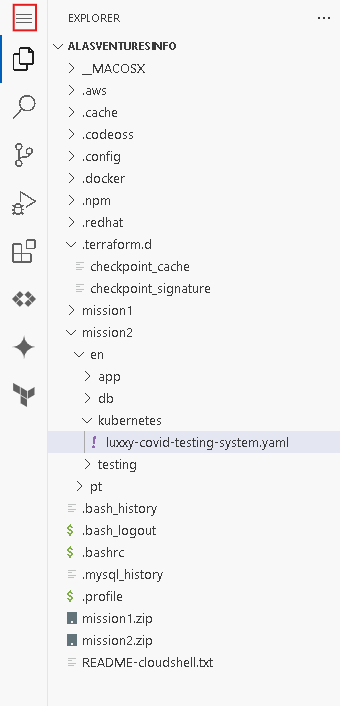
Then you will see this. Click on the Explorer icon and then click on Open Folder
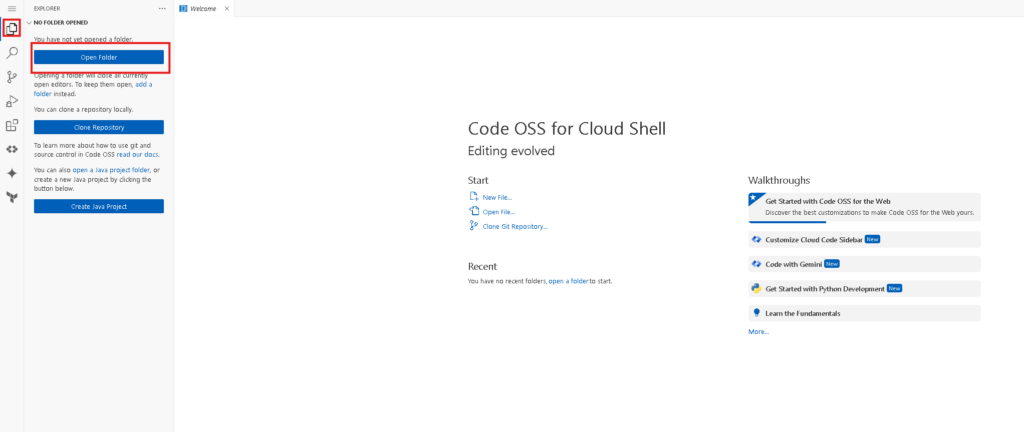
Just go to your home folder and click OK

Now go to the luxxy-covid-testing-system.yaml file
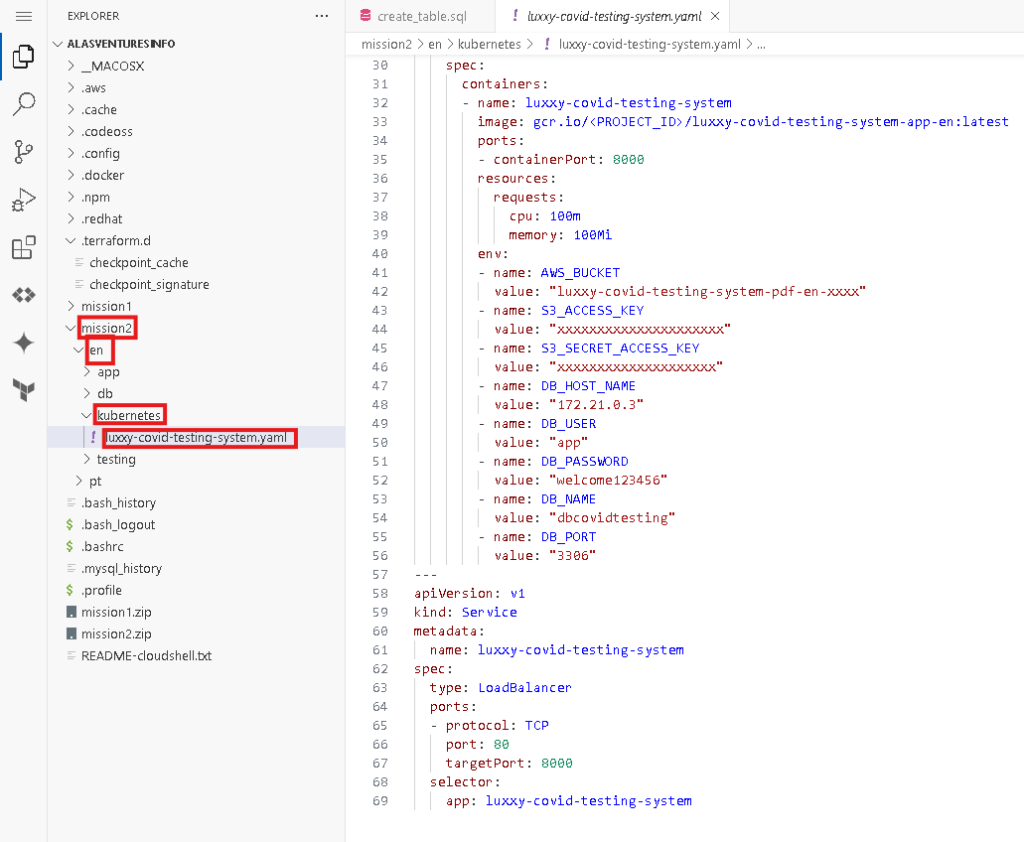
On line 33 replace <PROJECT_ID> with your actual Project ID


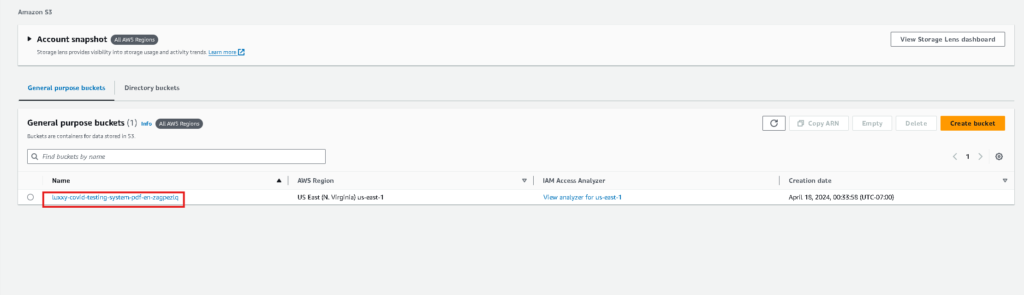
On line 42 replace “luxxy-covid-testing-system-pdf-en-xxxx” and go back to the AWS Console and type in S3 in the search box and click on S3.

Here you will see the bucket name. Copy it go back to the Shell Editor and replace “luxxy-covid-testing-system-pdf-en-xxxx” with the bucket name.

Now we are going to replace the S3 Access key and the S3 Secret Access key with the value of the key that we created when creating a new user in the first step. You should have saved that key inside a folder that you created. Open up the file luxxy-covid-testing-system-en-app1_accessKeys with a text editor.
The left-hand side of the comma is the Access key ID and on the right-hand side, it is the Secret access key. So just replace the value in the Shell Editor with those values.


Now put your private IP on line 48. It will show this by default.

To check your IP address type in SQL and click on the SQL page.

If the IP Address is the same you do not have to do anything but if it is not replace it.

Now save the file. click on those 3 lines then go to File > Save
Now we are going to connect to the Google Kubernetes Engine cluster via the Console to deploy the application.
Now search for the Kubernetes Engine

Click on the Kubernetes Engine cluster

Click Connect and Run in Cloud Shell
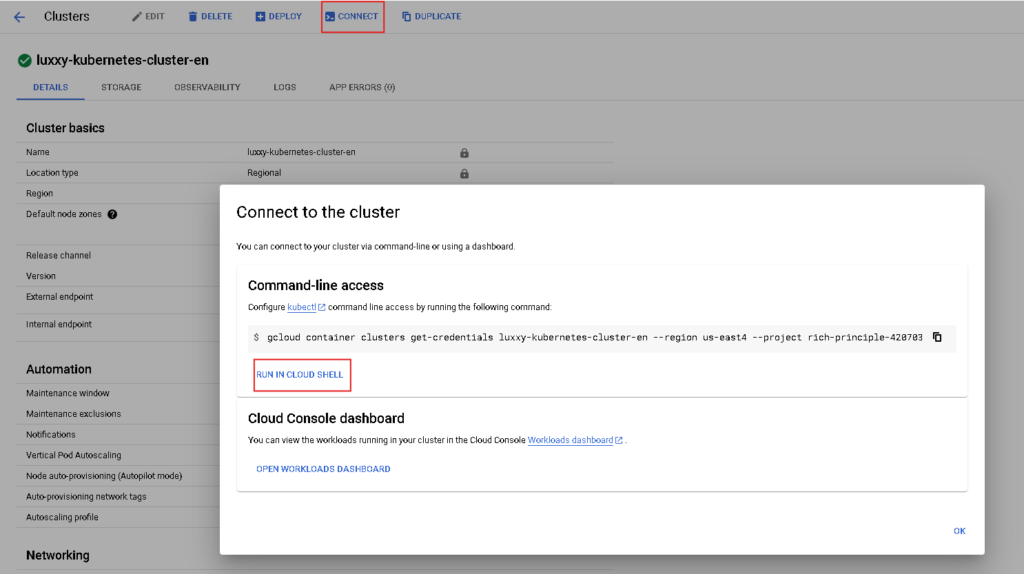
Now you will see a command on your Cloud Shell and it will get the credentials to connect and authenticated to the Kubernetes cluster.

And now we are inside the Kubernetes cluster.

Deploy the application Luxxy in the Cluster
cd ~/mission2/en/kubernetes (go inside folder where the application is)kubectl apply -f luxxy-covid-testing-system.yaml
(deploy the application inside the Kubernetes cluster. The kubernetes cluster just go using the API call )
Inside the Kubernetes cluster, it goes to the container registry and grabs a docker image, and uses this docker image to create a new deployment to create the pods and services and overall, expose our application to the internet

If you want to explore it a bit you can run:
kubectl get podskubectl get deployments kubectl get service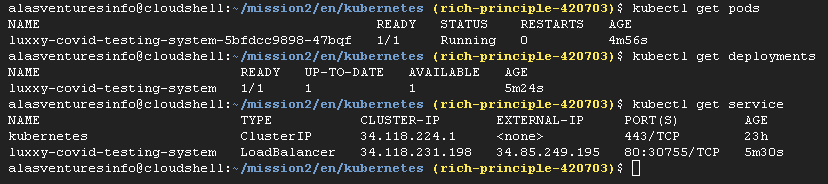
Under GKE > Workloads > Exposing Services, get the application Public IP

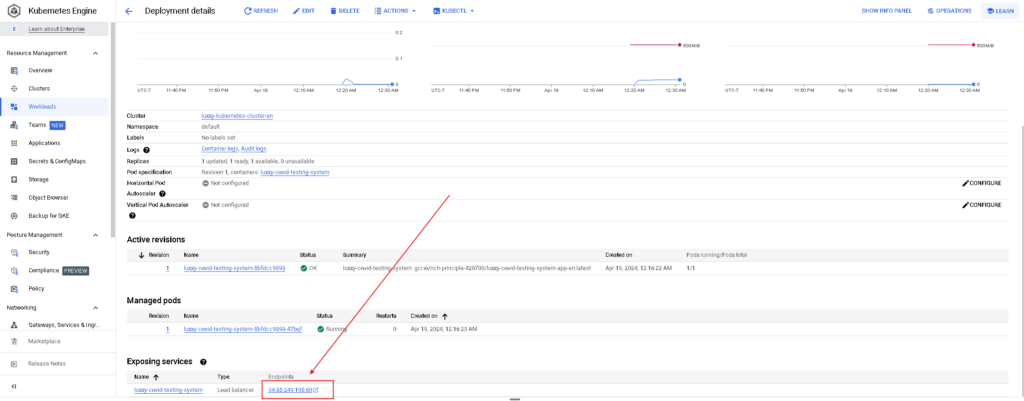
You should see the app up & running inside the Kubernetes cluster.
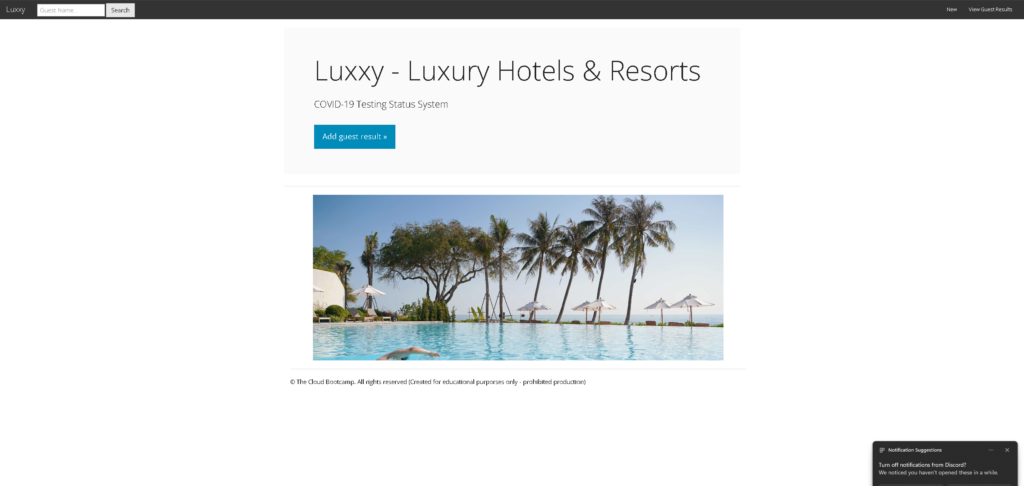
- Download a sample COVID testing and add an entry in the application. Click on the icon below to download the PDF ⬇️