
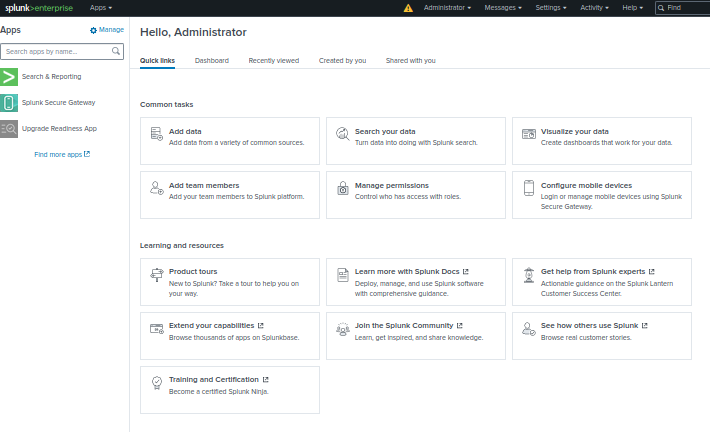
Welcome to the Soc Analyst Home lab!
In today’s interconnected digital landscape, the importance of a Security Operations Center (SOC) cannot be overstated. SOC teams play a critical role in safeguarding organizations against cyber threats, detecting and responding to incidents, and ensuring the integrity of digital assets.
Overview
I will walk you through the following key components of my SOC home lab:
- Downloading VirtualBox: Follow the process of downloading and setting up VirtualBox to create and manage virtual machines for your SOC lab environment.
- Installing OPNsense Firewall: Learn how to set up OPNsense, a robust open-source firewall solution, to protect your lab network and monitor traffic.
- Kali Linux as the Attack Machine: Discover how to use Kali Linux, a powerful penetration testing platform, to simulate attacks and test your defenses.
- Installing and Configuring Security Onion: Explore the setup of Security Onion, a comprehensive open-source platform for intrusion detection, network security monitoring, and log management.
- Setting Up a Domain Controller on Server 2022 as the victim network: Understand the steps to install and configure a domain controller using Windows Server 2022, the backbone of your Active Directory environment.
- Installing and Configuring a Windows 11 PC: Learn how to add a Windows 11 PC to your domain, enabling centralized management and security policies.
- Installing Splunk on Ubuntu Server: See how to install and configure Splunk, a leading data analytics and security monitoring tool, on an Ubuntu server to collect and analyze log data.
- Install Universal Fowarder/Sysmon: Install and configure The Splunk Universal Forwarder to send Window Event Logs to the Splunk Indexer.
Network Diagram

VM installation
First, we have to download Virtual Box or VMware.
This video will show you how to download Virtualbox and Kali Linux!
Watch this video on how to download VMware.
OPNsense Firewall Installation
Now I am going to Install and Configure OPNsense
To install Pfsense you can go to the OPNsense website
Here you click Amd64, image type DVD.
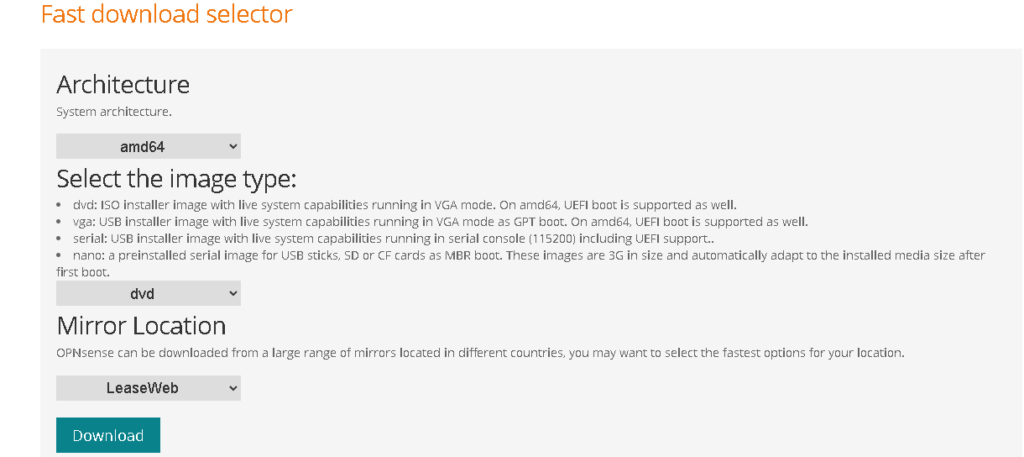
Once you have downloaded Pfsense you can use software like 7zip to extract it.
Now set up in a Virtual environment in either Virtual Box or VMware. Personally, I am going to use Virtualbox. From there add the OPNsense iso file to the machine and run it.
Once you finish setting it up and installing you should in the main menu1
From here I am going to assign interfaces. LAN >em1, WAN >em0 so the WAN can get an IP address from the DHCP server.
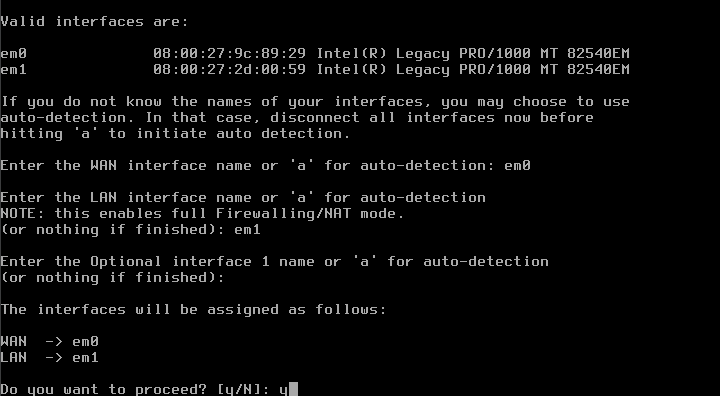
I assigned the LAN IP Address to 198.168.1.5

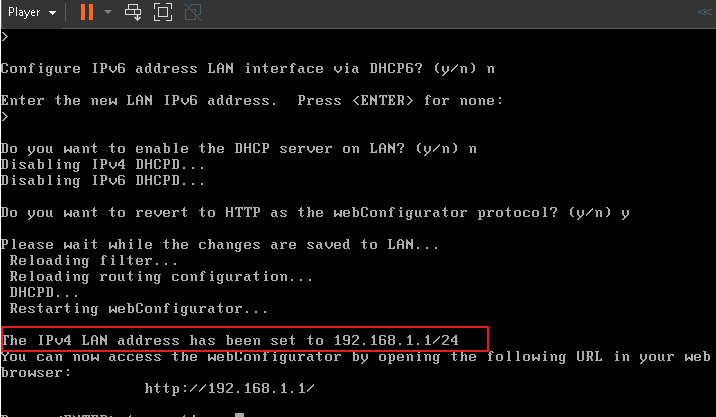
In order to change the IP address of the web configurator you need to change the IP address of your LAN to the one you want. Once you change it, it will be the default IP address for the web configurator.
That’s it for the firewall for now.
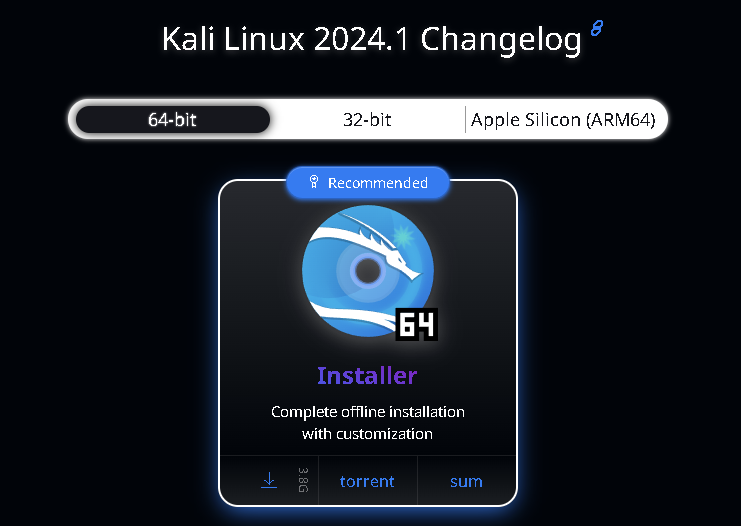
Let’s download Kali Linux
Once you download the iso file go to Vmware and run it.
Once you set it up to make a static IP to talk to the firewall
Use this video to learn how to do it.
This is what I have

To make sure that it can talk to the firewall try pinging it first

If it receives a reply this is a good sign.
Type in the LAN IP address to the browser and it should give you a login page. Enter the username and password that you have during the setup in my case is username is root and the password is root123
Once you login in you should be able to see this dashboard.

Let’s install the Suricata IDS/IPS solution on OPNsense.
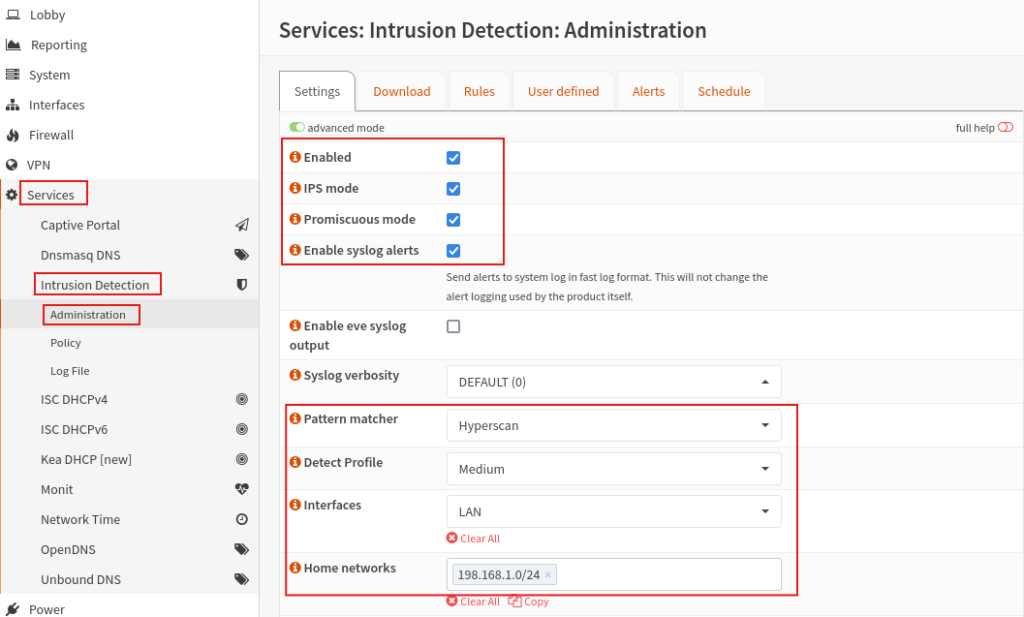
To enable the IDS, we go to Services > Intrusion Detection > Administration
Then click on advanced mode and enable the IDS, IPS mode, Promiscuous mode, and enable alerts.
Then put the pattern matcher to Hyperscan, Detect profile to medium, Interfaces to LAN, and then for Home network add your LAN subnet. Click Save.
Here you can see we can enable the service by pressing the play button.
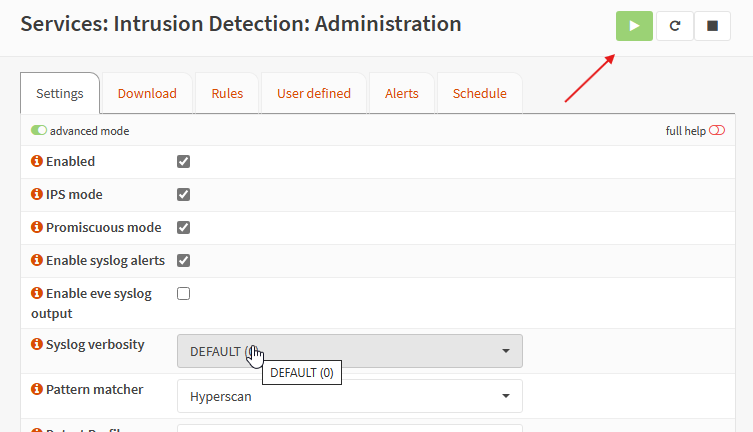
All we did is enable the IDS/IPS system but you still need to add the rules.
We are going to be adding a next-gen firewall to Pfsense using Zenarmor later
Downloading Security Onion
Now let’s download Security Onion and download the iso file.

Once you add the iso file it will automatically detect the oracle linux server. Click next then name the machine.

Specify disk size (minimum 200GB), store as a single file, and click Next.

Click “Customize Hardware” and do the following:
Change memory to 4-32GB
Add two Network Adapters and assign them Vmnet 4 & Vmnet 5 respectively

Click “Finish”
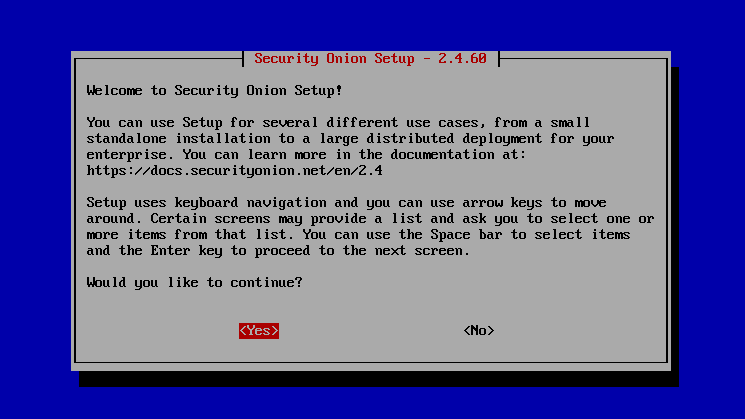
Power the virtual machine and click Enter when prompted:

After the initial stages of loading, type “yes” when prompted

Set a username & password:
After Security Onion Reboots, proceed with the following:
Enter the username & password

Select “Yes”
Click Enter

Select the EVAL option

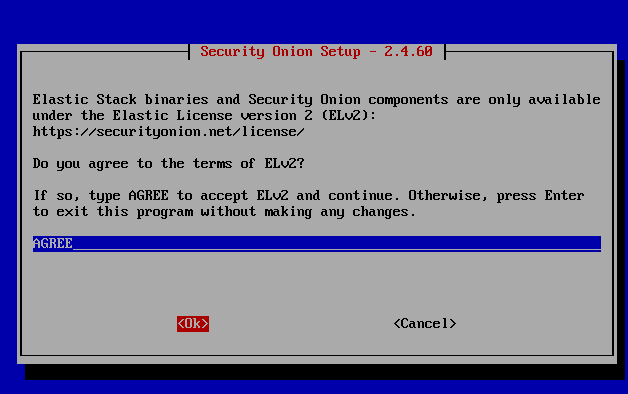
Type “AGREE”
Select “Standard”

Set a hostname
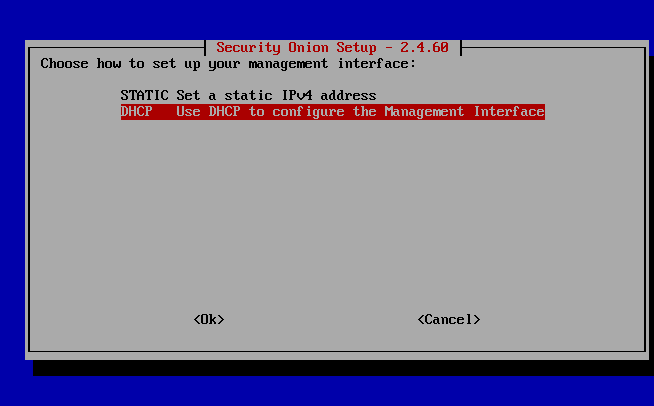
Click the spacebar to select ens160 as the management interface
Set the addressing to DHCP:
Select “YES” at the next prompt
Select “Direct” for the next prompt

Select Yes.

Click ens192

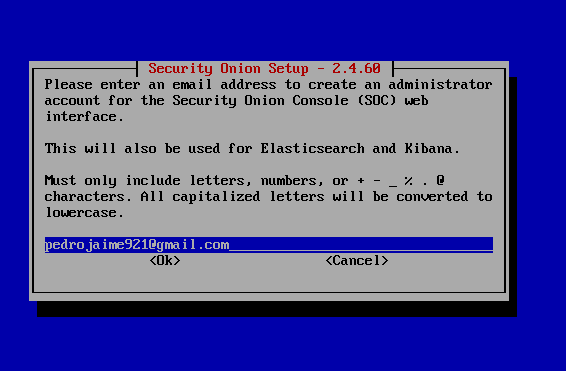
Enter an email address and password for the admin account
Select “IP”

Select “Yes” for the NTP server & accept the defaults
Select “Yes”

SecOnionMgmt/ Analyst Machine
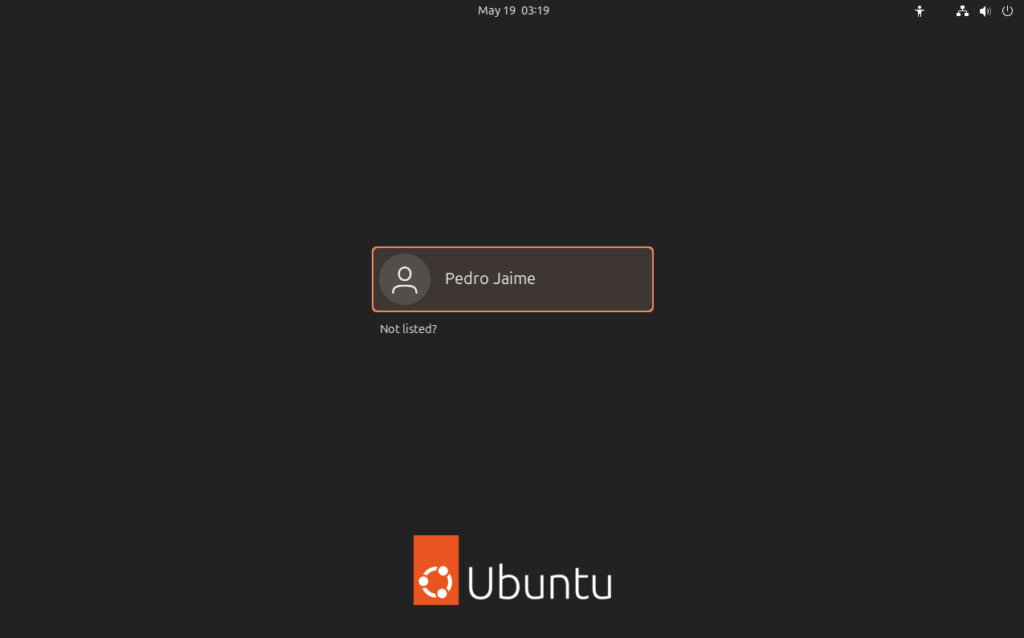
After installing Security Onion, having access to the web interface will be done from an external Ubuntu Desktop simulating a SOC/Security Analyst accessing a SIEM or any other tool from their device.
To do this, you’ll first have to configure an Ubuntu Desktop. This is a very easy process and I’ll not be covering it in this write-up but it is covered in the video. Be sure to use all the default settings for the Ubuntu Desktop configuration.
After this installation, run the ifconfig command on the Ubuntu Machine and take note of its IP Address.
Head back to your Security Onion instance and run the following command
sudo so-allow
Enter your password
Type a and wait for the process to complete

Type in the IP Address from the Ubuntu Desktop
This will create a firewall rule on Security Onion that will allow you web access from your Ubuntu Desktop.
Navigate to the Security Onion IP Address on your Ubuntu Desktop:

This ends the configuration of the Security Onion VM.
Installing and Configuring Windows Server 2022.
Power on the Virtual Machine and immediately click any key.
Click Next
Click Install Now

Select the Windows Server 2019 standard Evaluation (Desktop Experience)
Accept the License Terms
Click Next
Select the Custom Install

You should have this screen now

When that is complete, create a password

After the installation and login, it should automatically pull up the Server Manager

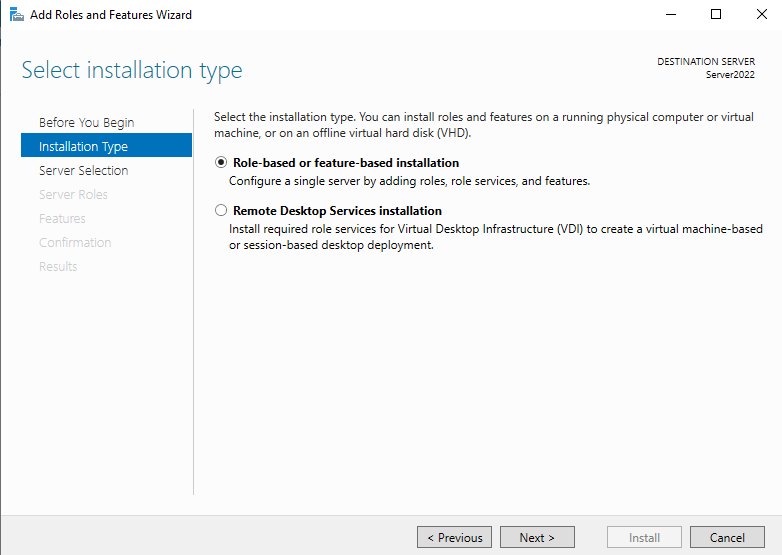
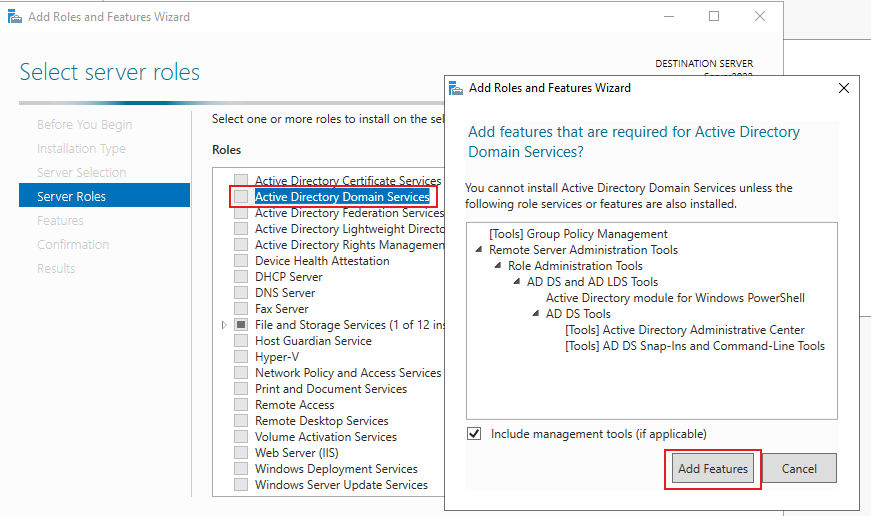
On the Server Manager Dashboard, Click Manage >> Add Roles and Features

Keep clicking Next till you get to the Server Roles menu
Select Active Directory Domain Services
Select “Add Features“
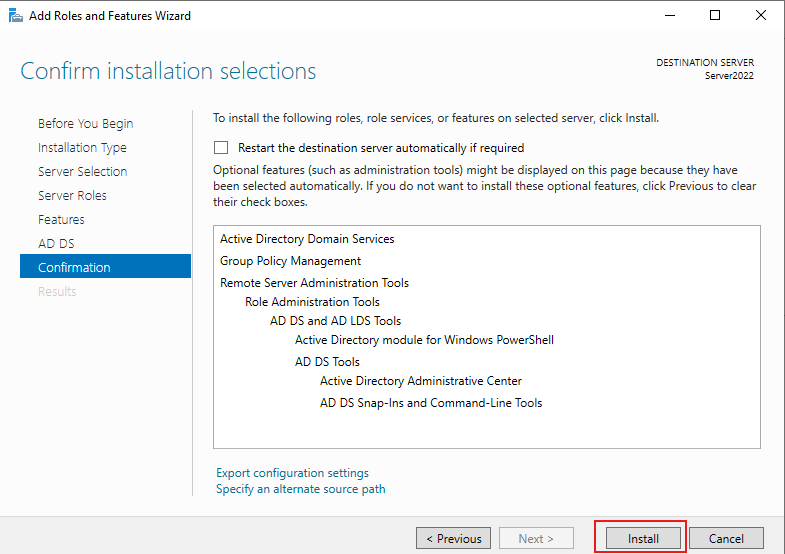
Click on Next till you get to the Confirmation menu, then click Install
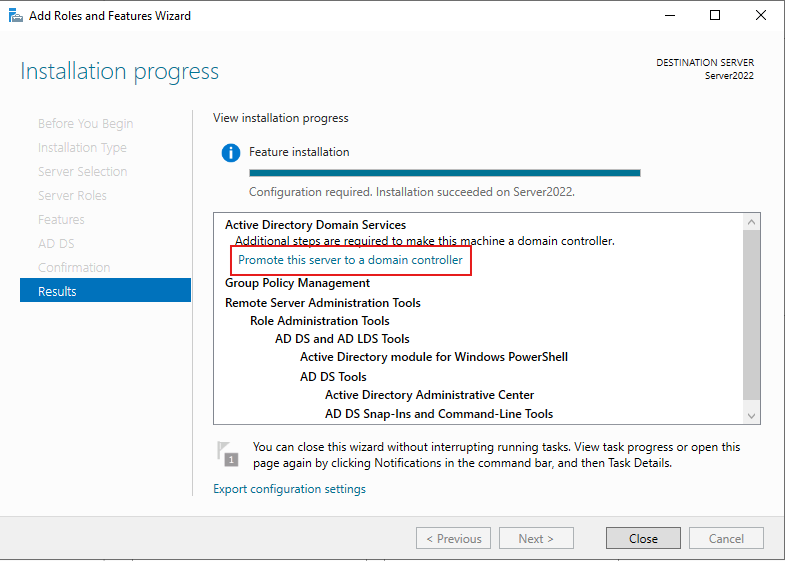
Select “Promote this server to a domain controller“
Select Add a new forest and Specify a domain name
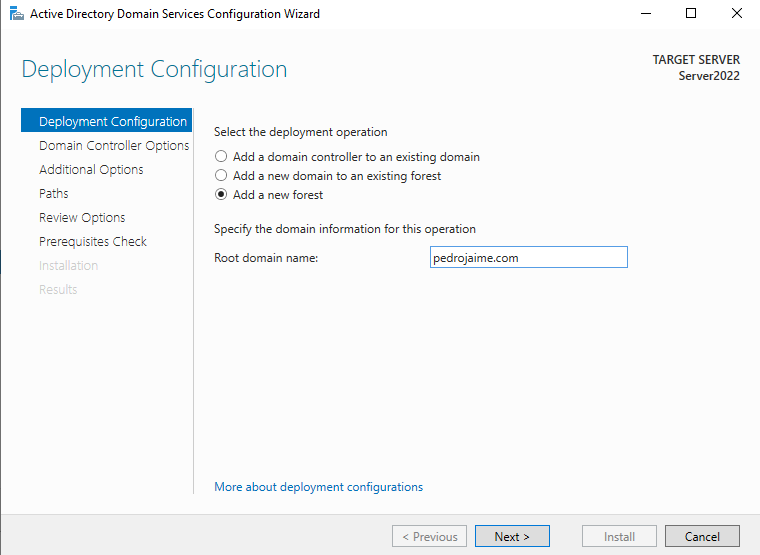
* Click Next
* Set a Password
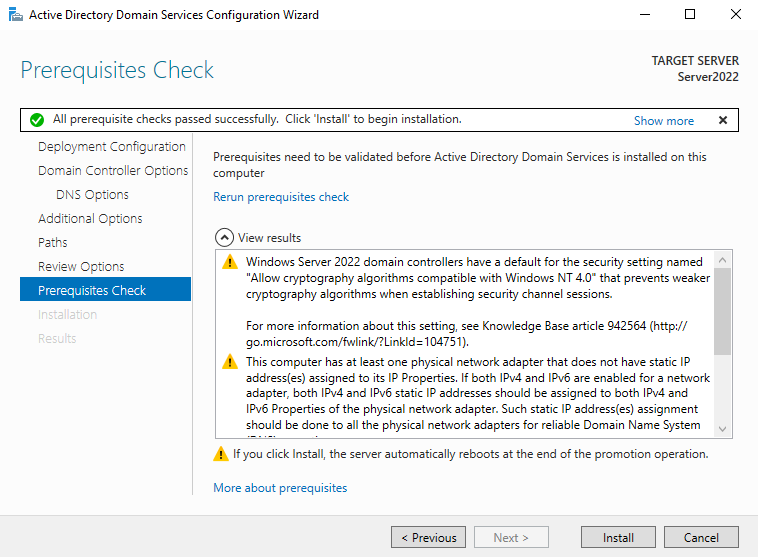
Click Next till you get to the Prerequisites Check Menu
Click Install
After it finishes installing, it will Reboot
After the Reboot, Log back in
Select Manage >> Add Roles & Features again on the Server Manager
Click Next till you get to Server Roles

Let’s add some users.
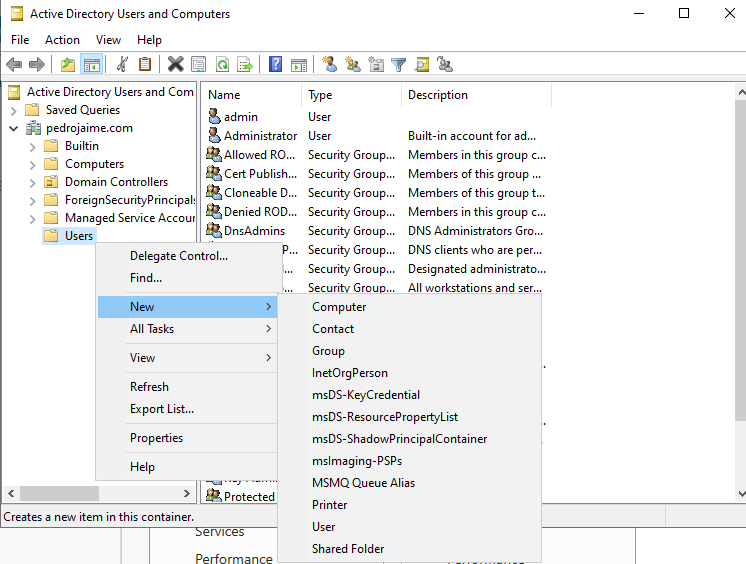
In the Server Manager Select Tools > Active Directory Users and Computers

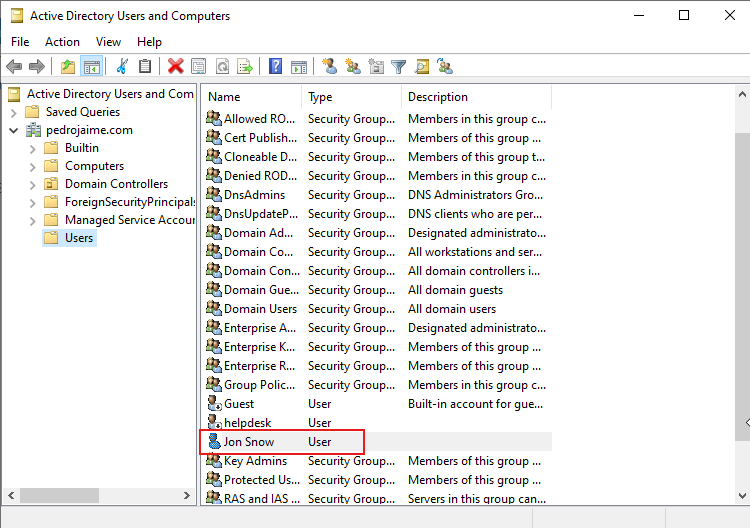
Select your Domain Name (pedrojaime.com) > Users, Right Click & Select New > User
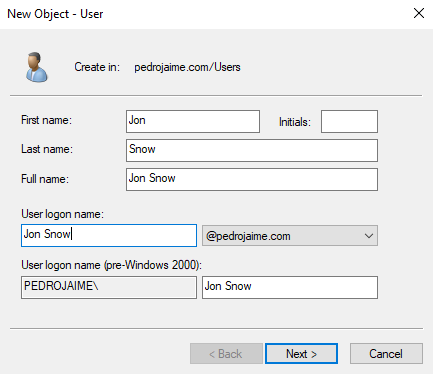
Enter the First and last name & User login name for the user.
Set a password that never expires. Select Finish.
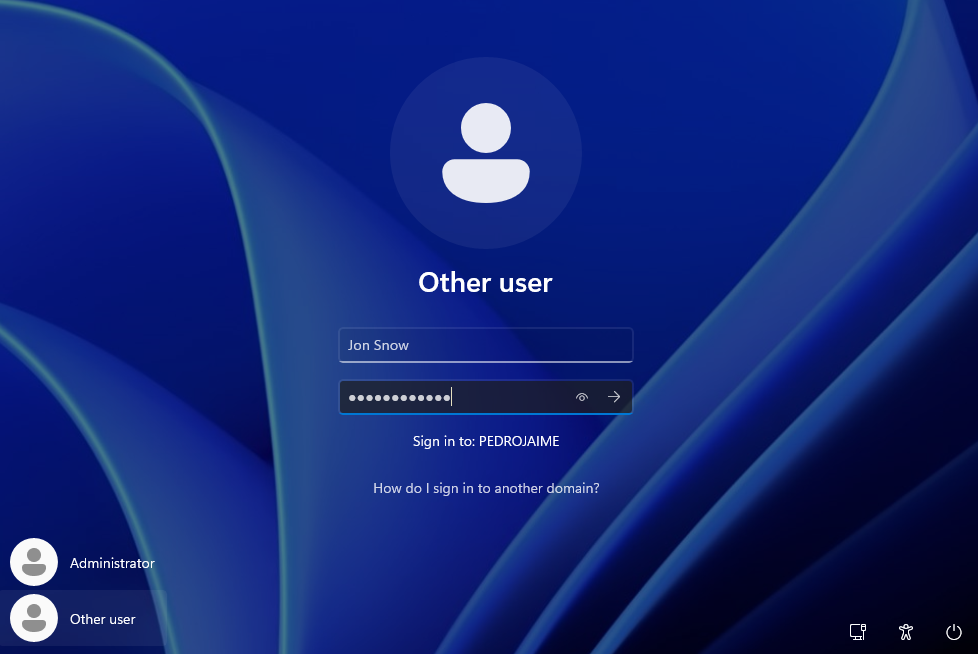
The user Jon Snow should appear here.
Now we have to disable the firewall to analyze all types of vulnerabilities.
Search for “Windows Defender Firewall” > Turn Windows Defender Firewall on or off.
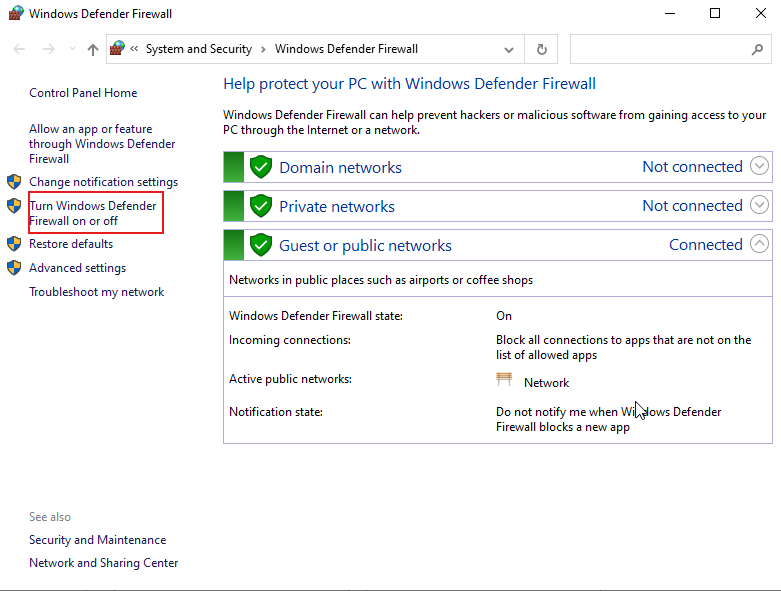
Turn off the firewall for all Networks

Now Use OPNsense as the default gateway for the Domain Controller
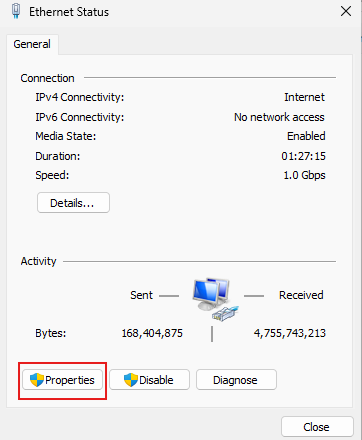
~ Navigate to Control Panel > Network and Internet > Network Connections
~ Enter the following configuration

Configuring Windows 11 Desktop & Adding a User to the AD Domain
The goal of this portion of the lab is to add 2 Windows 10 desktops to the Domain and complete the active directory lab. This portion of the lab is very easy to set up.
Install in Virtualbox as usual with defaults
* Do not worry about a product key, simply click Next
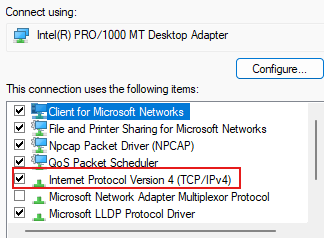
Go to Control Panel and click View network status and tasks
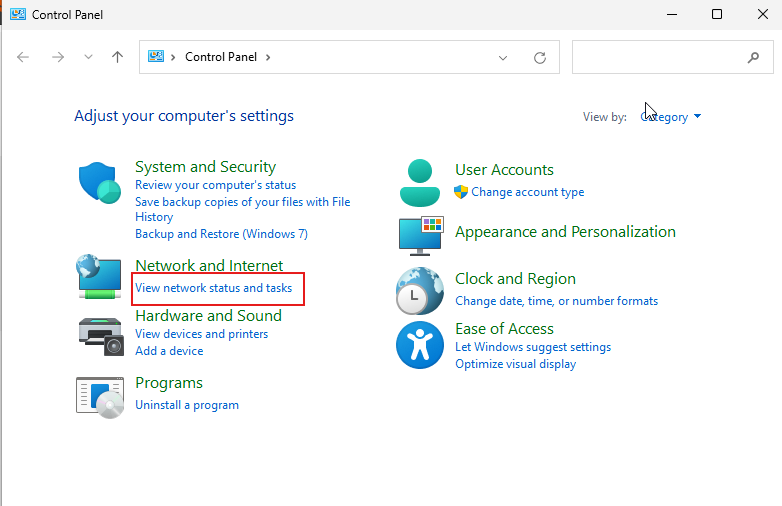
Navigate to Change Network Adapter settings
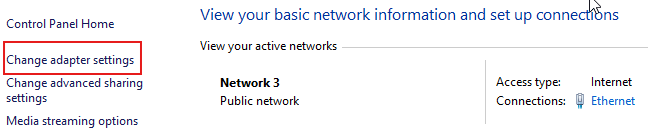
~ Right-click on Ethernet0 and select properties

Go to Properties
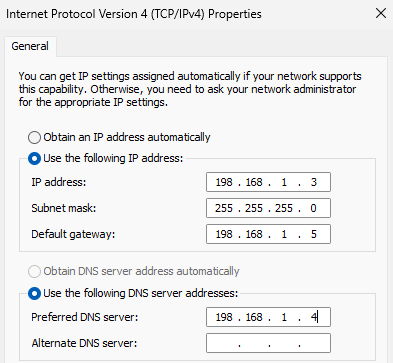
Select IPV4
Add an IP Address(198.168.1.3) & Use 192.168.1.5 as the default gateway
Make sure that the DNS server is the IP address of the Domain controller/Server 2022
or else you won’t be able to contact it (198.168.1.4).
Join PC to pedrojaime.com Domain
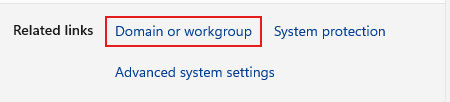
First, go to the File Explorer, right-click on This PC, then click Properties.
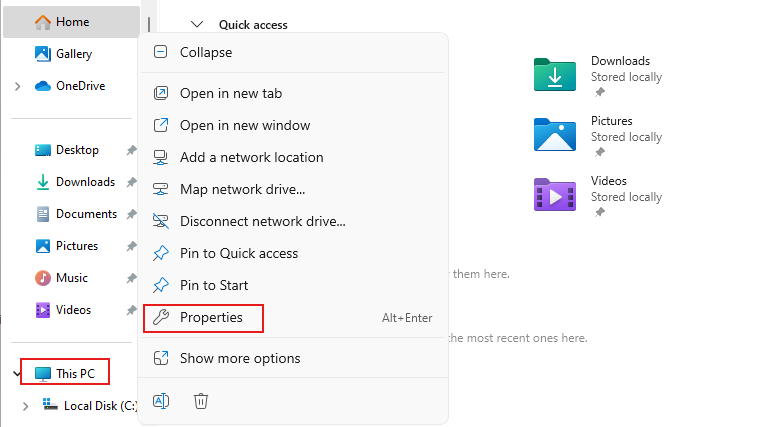
Then click Domain or Workgroup.
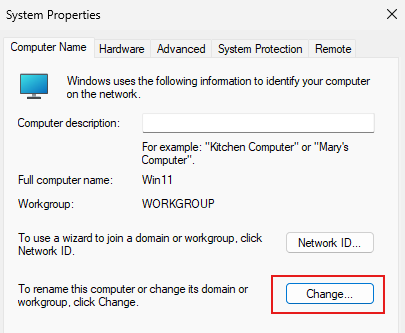
Click Change
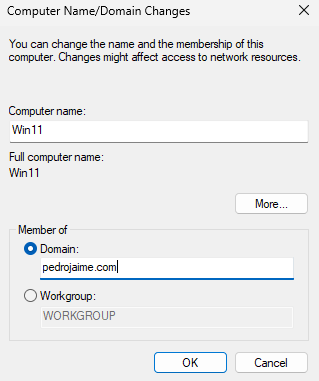
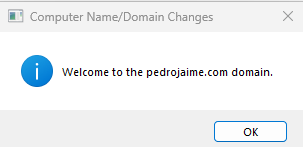
Type the domain you want to join and click OK.
Put in your username and password
Now restart the PC
Lets see if we can sign in using the Jon Snow user that we created in the server now that we have join the Domain.
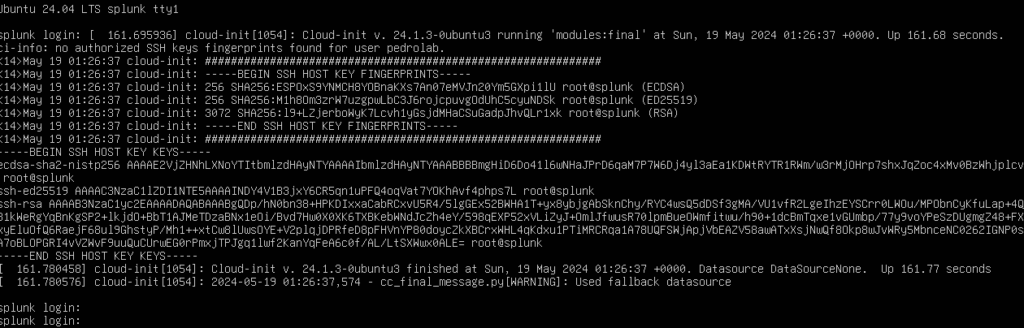
Installing Ubuntu Server for Splunk
I am going to use the Ubuntu server for the Splunk Instance.
You can download the server here.
Now create a new virtual machine for the Ubuntu server and add the ISO file, then run the machine
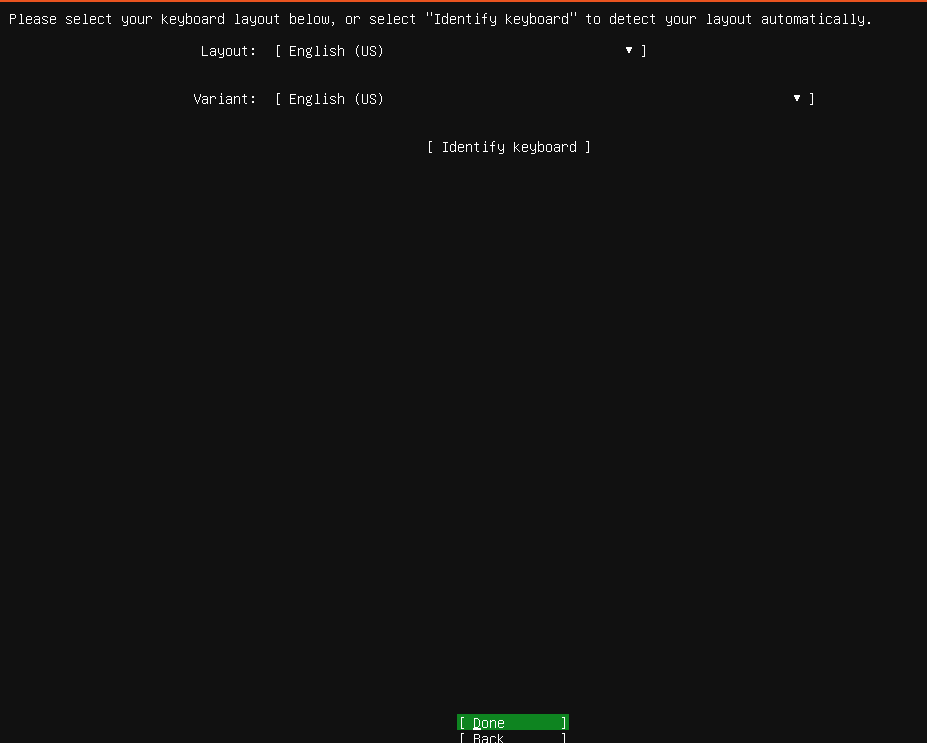
Choose language

Keyboard layout
Keep clicking Done until you get to this screen.
Click Continue

Fill in your information

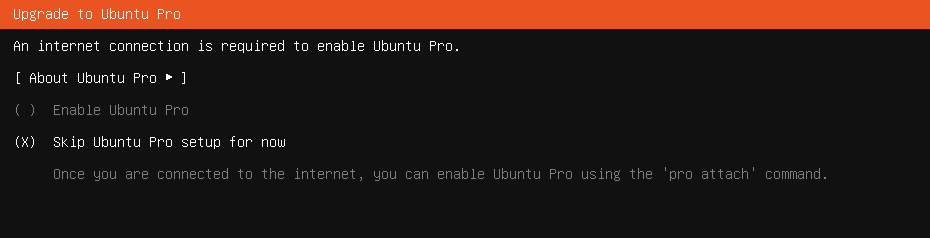
Skip
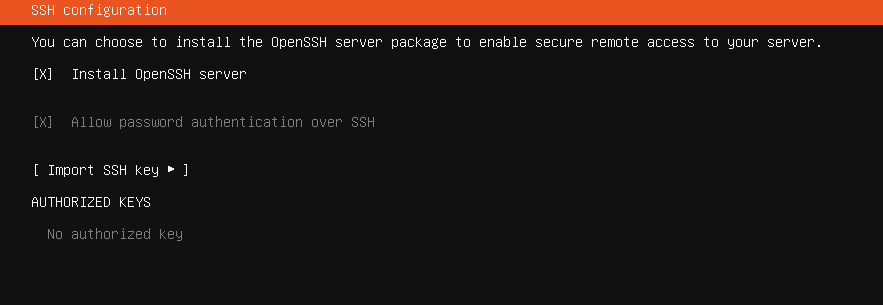
Mark an X on OpenSSH and click Done
Now it should start installing.

Once it is complete click Reboot

Once it has rebooted, it will prompt you with the credentials that you created earlier.
Once you log in you should see this on your screen.

Now type in this command sudo apt install tasksel to install multiple packages on the server and enter your password. Then type “y” for yes and it will start downloading.

Now run this command sudo apt install ubuntu-desktop and enter the password. (This installation will take a while so sit tight.)

Once it is finished downloading reboot the machine by typing reboot.
After rebooting you should see this and be able to log in.
Let’s give the server a static IP address
Go to the terminal and type in
sudo nano /etc/netplan/00-installer-config.yaml
Enter these settings. Add an IP address, DNS server, and a Default Gateway.
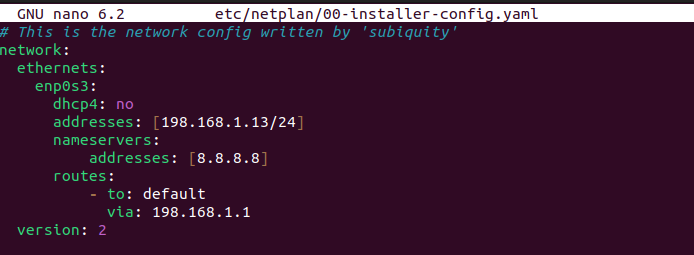
Save the file with CTRL + O and press enter to overwrite the existing file.
Exit with CTRL + X.
Now type ip a to display the new IP address.

Downloading Splunk
Open Firefox and go to Splunk.com
Now click on the 3 lines.

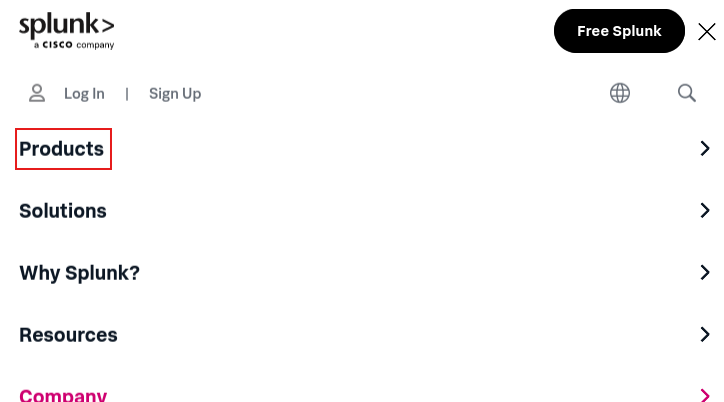
Click on Products.
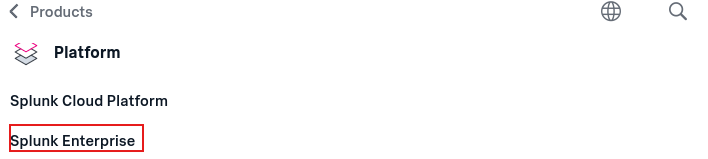
Scroll down to Splunk Enterprise.
Click on Free Trial.

Sign up. NOTE: You need a business email to make an account. If you do not have a business email, alternative SIEMS that are free are IBM QRadar Community Edition Elastic and Wazuh.
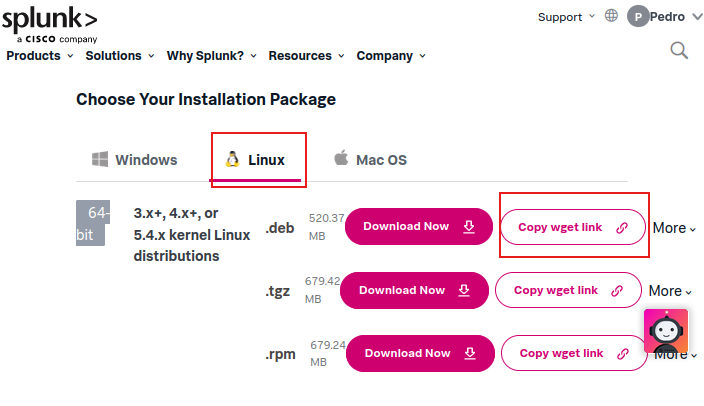
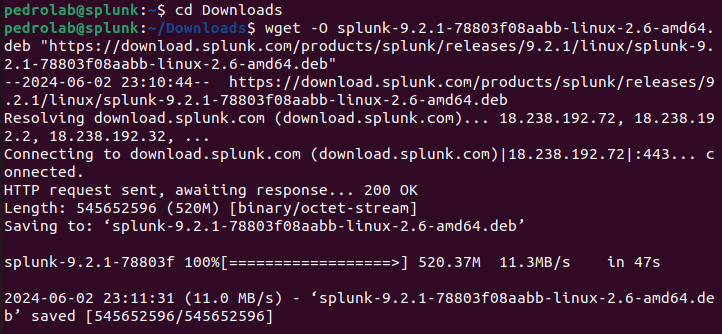
Head over to Linux and copy the wget command. We are going to download the installer using the terminal.
Installing Splunk Installer
Navigate to the downloads folder to download the Splunk installer and and paste the wget command.
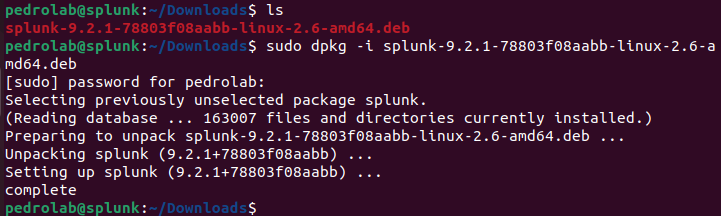
Install Splunk
sudo dpkg -i splunk-7.1.1-8f0ead9ec3db-linux-2.6-amd64.deb
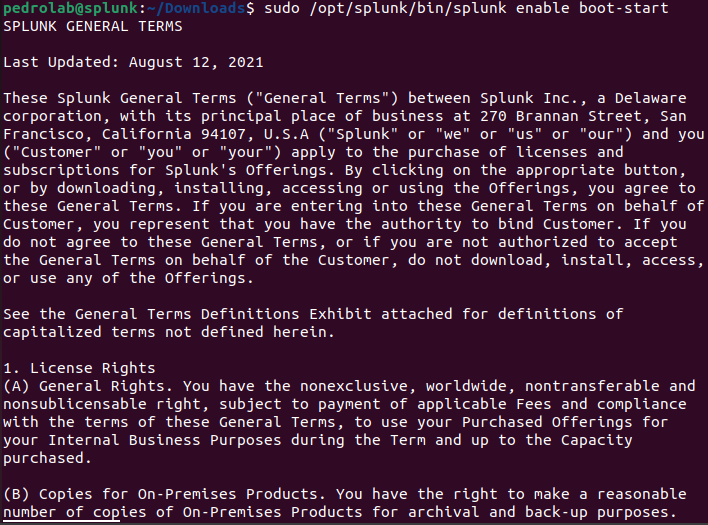
3. Enable the Splunk to start at boot
sudo /opt/splunk/bin/splunk enable boot-start

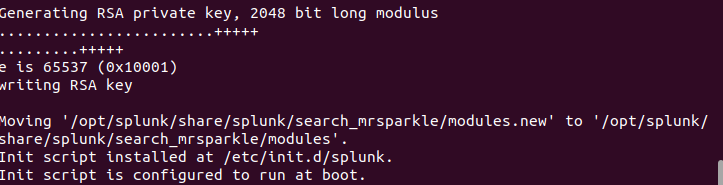
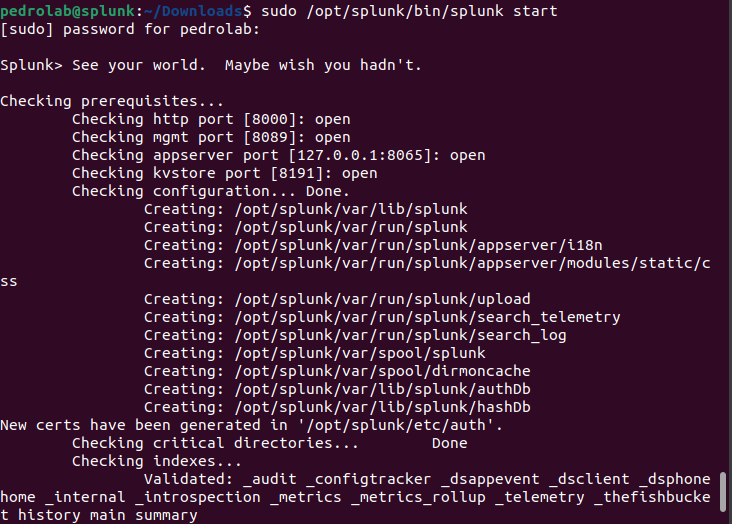
Start the Splunk service
sudo /opt/splunk/bin/splunk start
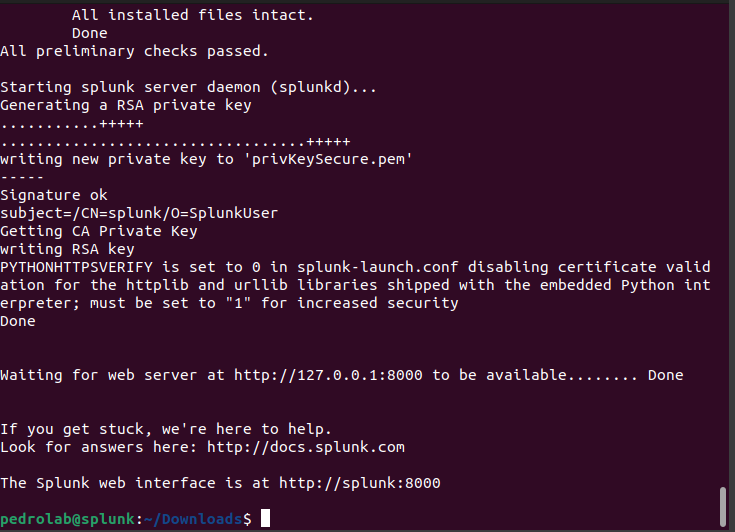
We have now started Splunk. Copy the web interface URL and paste it into your browser to access it.
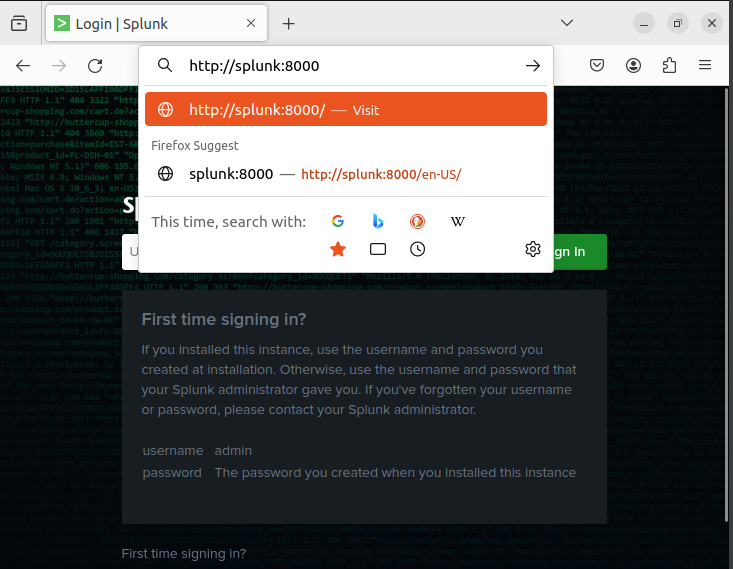
Log in with the username and password you entered during the Splunk installation.
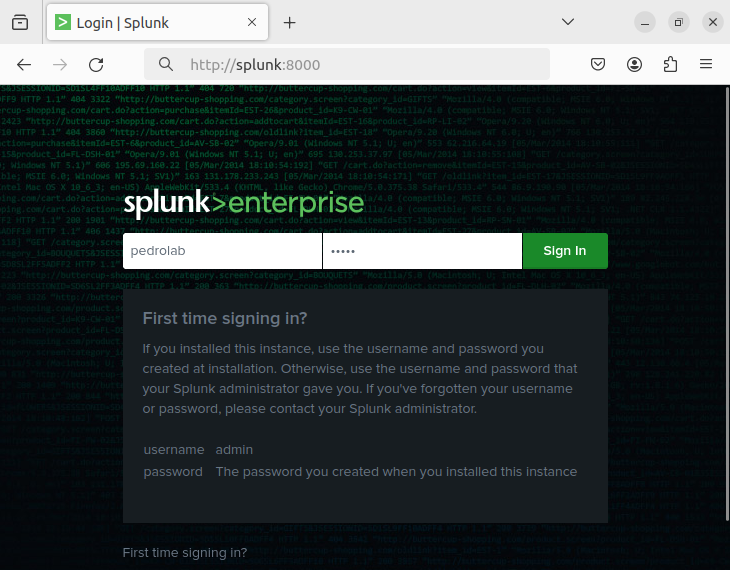
Congratulation you have downloaded Splunk.
Installing Universal Forwarder
We need to start forwarding logs to the server and we are going to do this by installing the Splunk Universal Forwarder.
The first thing we need to do is allow Splunk the ability for logs to come into our server.
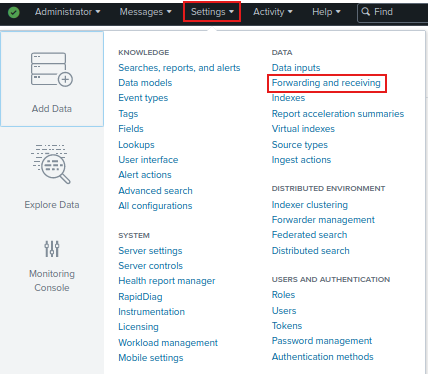
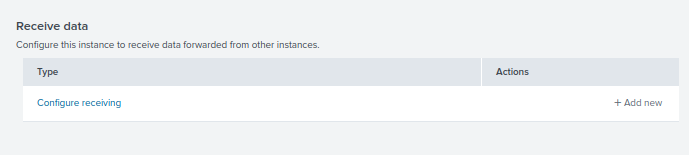
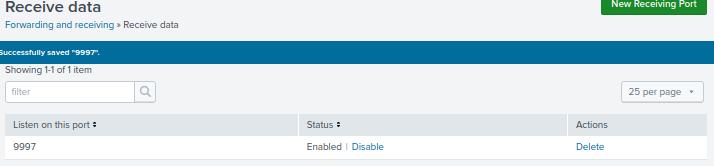
We first need to go to Settings > under “Data” and click Forwarding and Receiving.

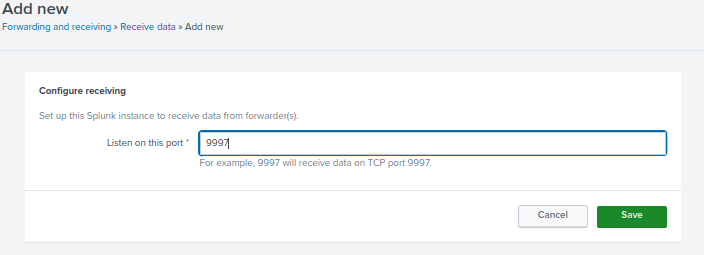
Add the port 9997. This is the default port Splunk listens to for the Universal Forwarder. Then click Save.
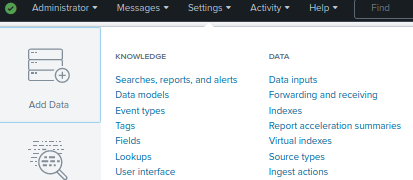
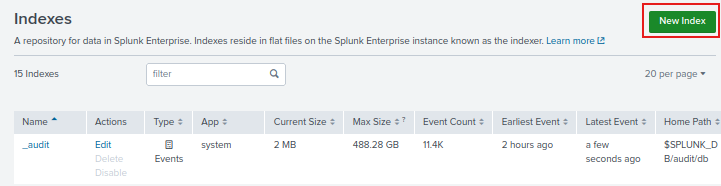
Now we are going back to settings and click on indexes to create a new index. Indexes are where the logs are stored.
Click on New Index.
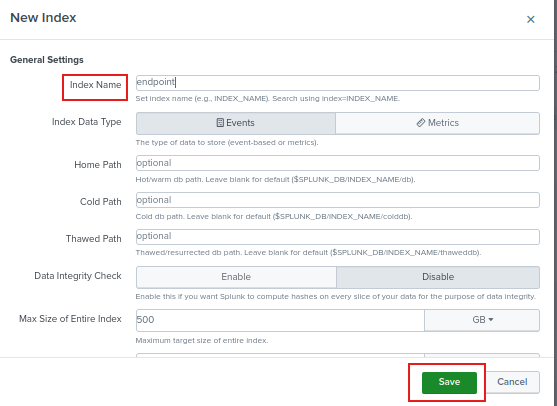
Name your index. I am going to name mine endpoint. Then click Save.
You can see it listed here.

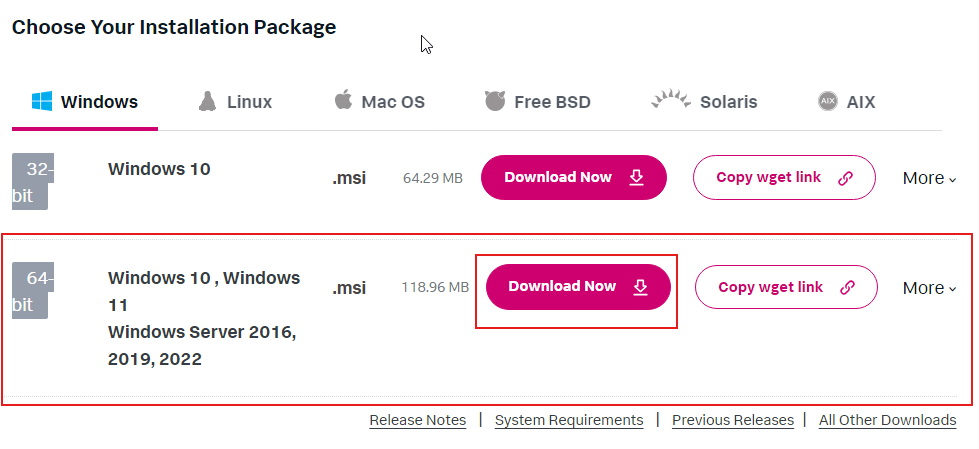
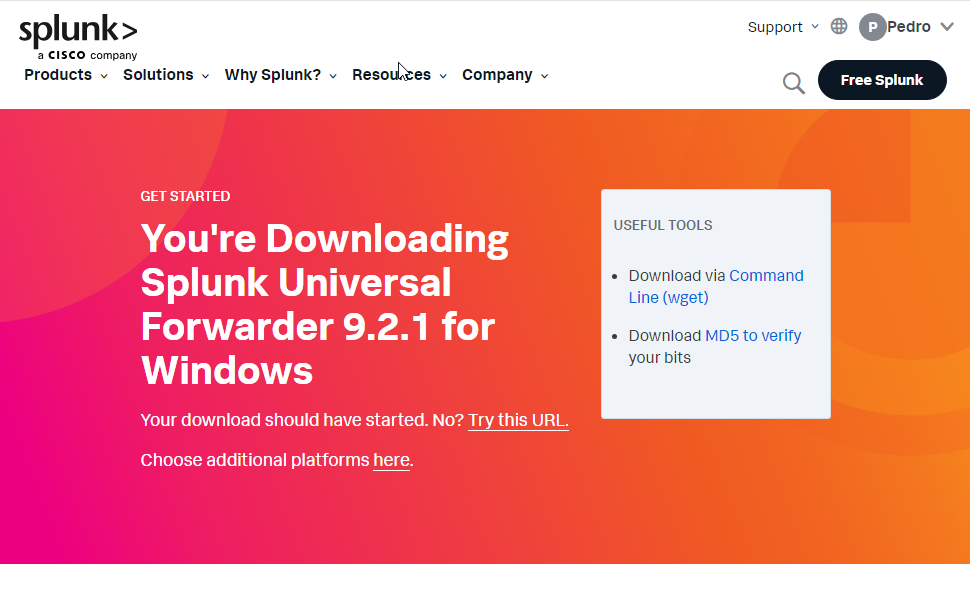
Now we have to head over to our Windows Server and download the Universal Forwarder to start sending logs from the domain controller to the Splunk Server.
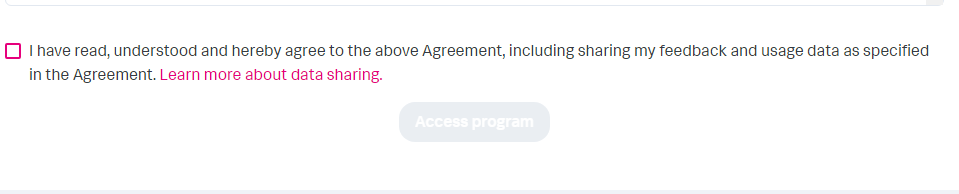
Go to your browser and download the Universal Forwarder. Sign in to your account if you need to, then download this one:
Accept the Terms and Conditions.
Open up the file and start the setup.
Check the License Agreement and click Next.
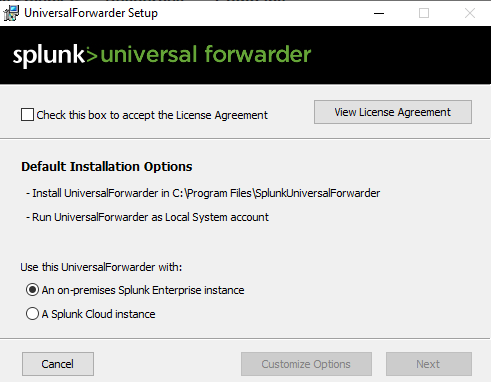
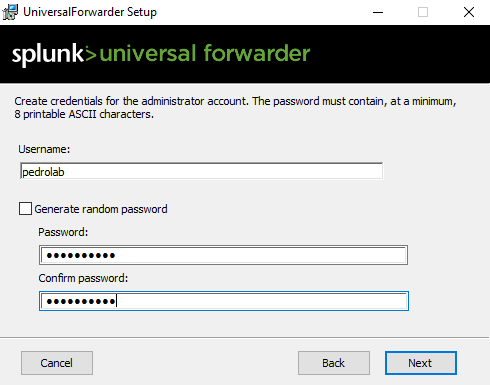
Make a Username and Password. I am using the same credentials I used for my Splunk Instance.
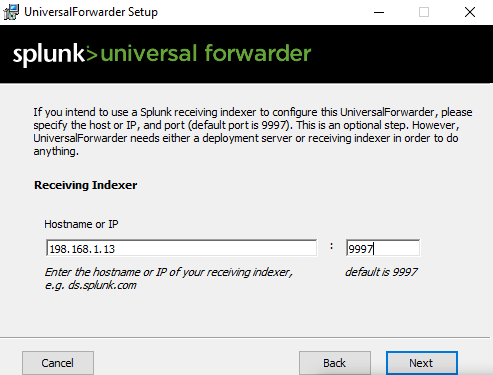
Skip the Deployment Server
Add the IP Address of the Splunk Server with port is 9997
Click Install.
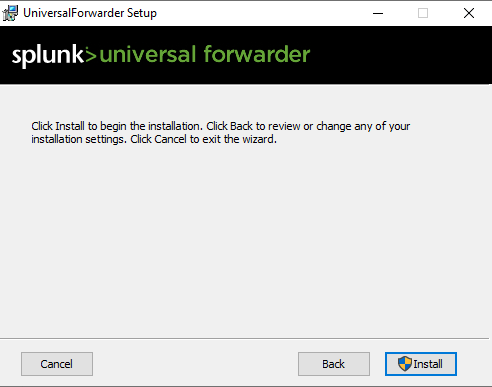
Once it’s done click Finish.
Now let’s go back to our Splunk instance
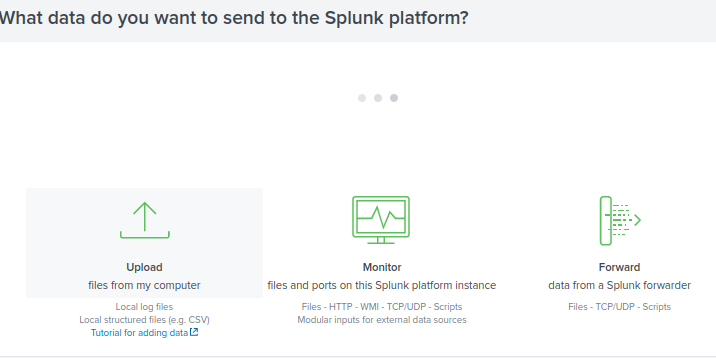
Go to Settings > Add Data
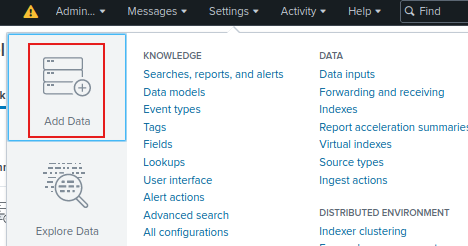
Click on Forwarder.
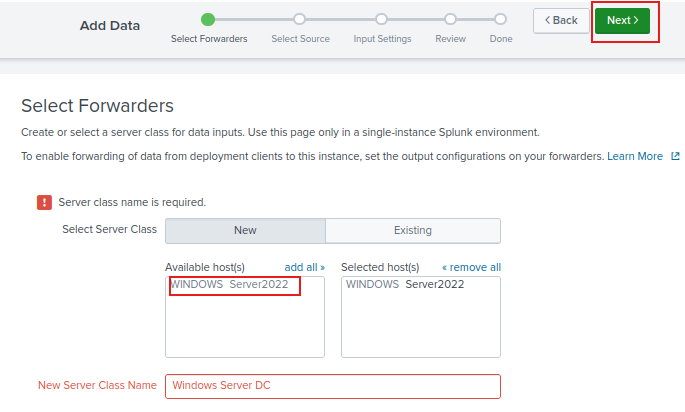
As you can see our server has been configured from the setup.
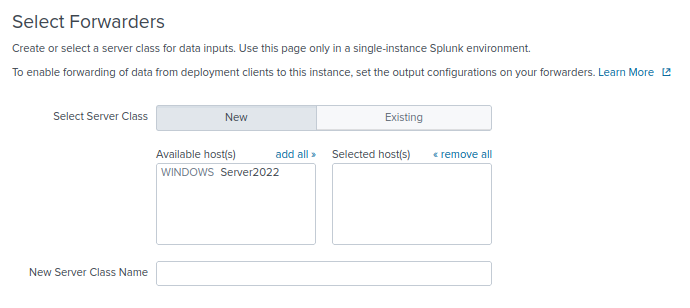
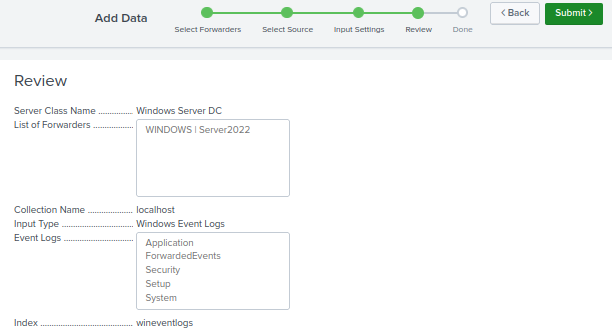
Click on your host to add it to the selected hosts. Then click Next at the top right corner. Add the Server Class Name.
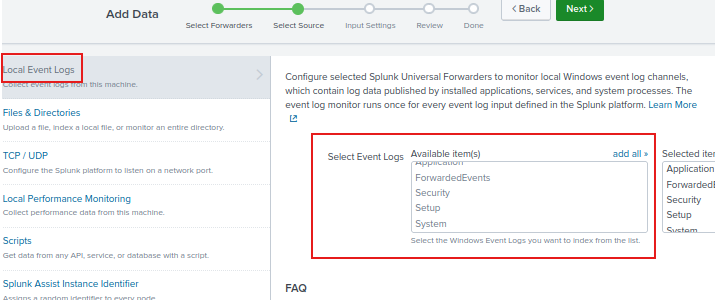
Now we have to choose where we want to be monitoring from.
Click on all the options for Local event logs. This will collect all the event logs on my Domain Controller.
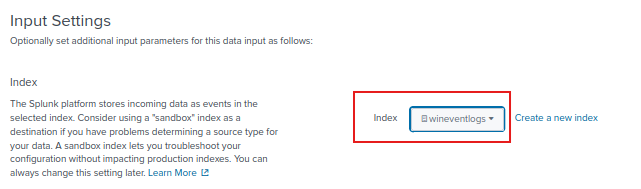
Click on the drop-down menu and select the index you created. Now click Review.
Review everything then click submit.
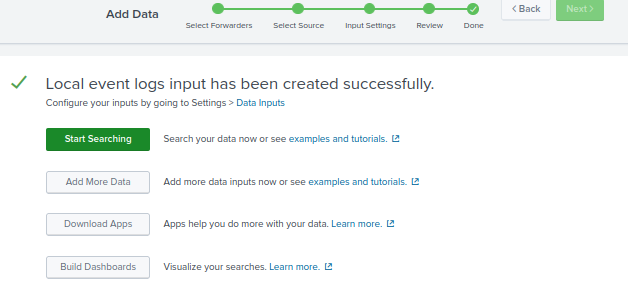
Congratulations! Now you can start searching for logs by clicking Start Searching.
Sysmon Installation
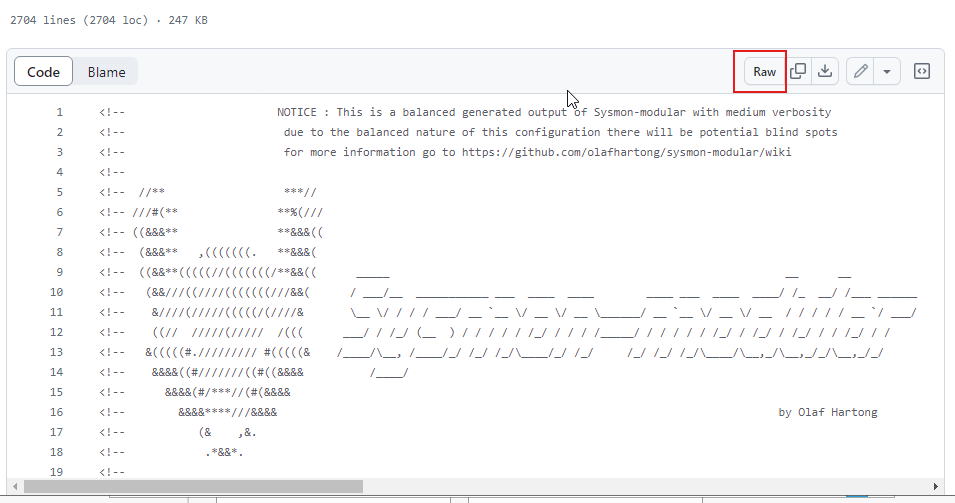
Sysmon, or System Monitor, is a Windows system service and device driver that monitors and logs system activity. It can provide detailed information about process creations, network connections, and changes to file creation time. Sysmon logs are stored in the Windows Event Log, specifically within the Microsoft-Windows-Sysmon/Operational event log channel.
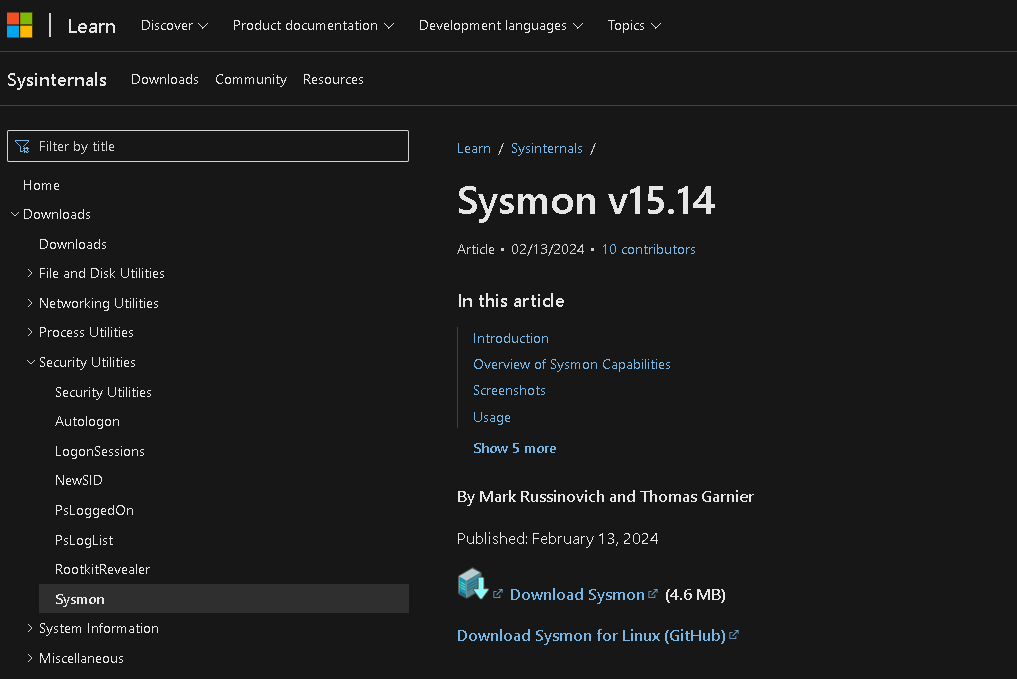
Download Sysmon here
Click on Download Sysmon.
Save the File in the Downloads folder
Now lets download the Sysmon configuration.
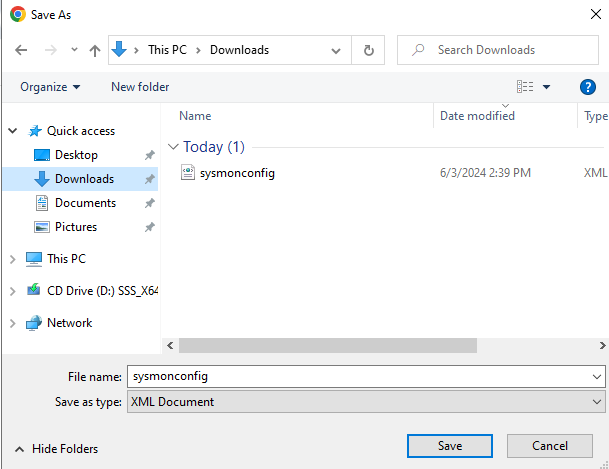
Download the Sysmon configuration here
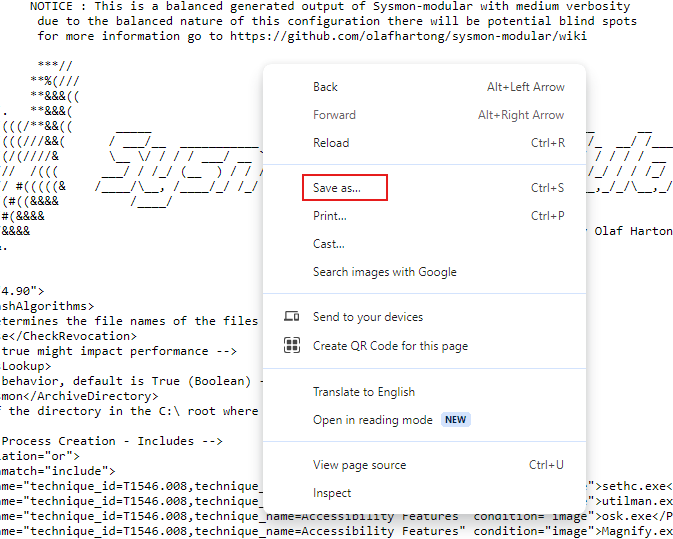
Save it in the downloads folder.
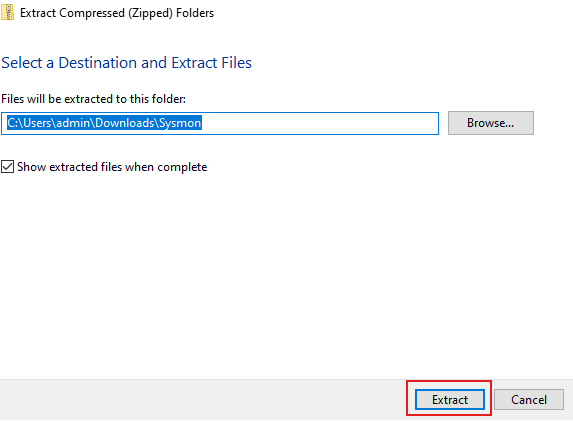
Go to Downloads and right-click on the Extract the Sysmon zip file you downloaded.

Click Extract.
Right click then copy the path.

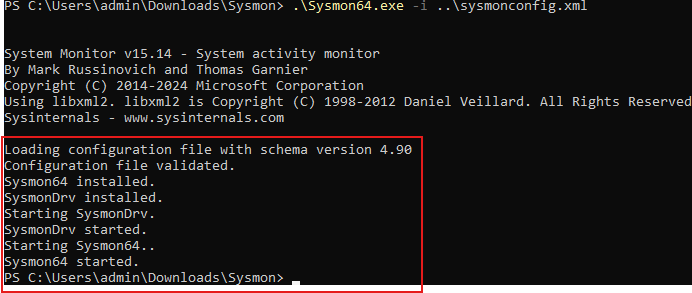
Run PowerShell as admin and go to this directory that you just copied.

Download Sysmon and its configuration.

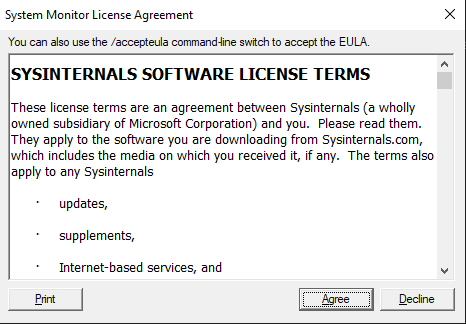
Agree to License Terms.
Installation successful.
Conclusion: Successfully Building Your SOC Home Lab
Congratulations on setting up your SOC home lab! By following this guide, you’ve gained hands-on experience with a variety of cybersecurity tools and technologies, setting a solid foundation for advanced learning and professional growth.
In this lab, you’ve accomplished:
- Downloading and Configuring VirtualBox: You’ve successfully set up VirtualBox to create and manage virtual machines.
- Installing OPNsense Firewall: You’ve set up a robust firewall to protect your network and monitor traffic.
- Setting Up Kali Linux as the Attack Machine: You’ve configured a powerful platform to simulate attacks and test your defenses.
- Setting Up Security Onion: You’ve deployed an open-source platform for intrusion detection, network security monitoring, and log management.
- Configuring a Domain Controller on Server 2022: You’ve established the backbone of your Active Directory environment.
- Adding a Windows 11 PC to the Domain: You’ve integrated a Windows 11 PC into your domain for centralized management and security.
- Installing Splunk on Ubuntu Server: You’ve installed and configured a leading security monitoring tool to collect and analyze log data.
- Installed Universal Forwarder and Symon: Send endpoint logs to the Splunk server to parse through logs.
These steps have provided you with a practical understanding of how a SOC operates, preparing you to tackle real-world cybersecurity challenges. Keep exploring, testing, and learning within your lab environment to continue honing your skills.
Thank you for following along with this guide. I hope it has been informative and helpful. If you have any questions or need further assistance, feel free to reach out. Happy learning and stay secure!
NOTE: I will keep updating this lab with time.